Wheat farm. Wheat farm, creating a wheat farm in Minecraft. Key points to be implemented
The picker is ready. Now, when the wheat is ripe, it is necessary to destroy the block of earth and the water will bring the entire crop to the collection point. You can also use a piston or a distributor with a bucket of water instead of a block with earth, then it will be enough just to turn it off.
Additionally
- For planting wheat, you can not look for 126 seeds at once, but find a small amount of them and plant them. After you harvest, you will receive more seeds.
- You can not take 11 buckets of water, limiting yourself to one bucket and.
- Instead of a ground block, you can use a piston gate (since Beta 1.7).
- At the collection point, you can put a loading funnel with a chest to automate the collection.
Fully Automatic Wheat Farm (Via Villager)
For versions 1.8 and above. A very easy farm to build. It is fully automatic and collection and landing as well. Using a resident.
Fully automatic farm (more complex option)
It is possible to build a fully automatic farm and more difficult, taking into account zombie attacks, maturation time and a villager's inventory.
Key points to be implemented
- The truss must be completely closed on all sides with transparent blocks, such as glass. This is necessary to prevent zombie attacks from outside. The fence is not suitable, because through it the zombies quite reach the farmer with disastrous consequences.
- The farm should be as illuminated as possible. This is necessary both for plant growth and to prevent hostile mobs from spawning at night on the farm.
- The farm must be protected from siege. To do this, we tie dogs inside the farm, create iron golems. Moreover, the height of the farm should take into account the height of the golems.
- The farm must harvest once every four days. During this period, there is a high probability of full ripening of the crop.
- The farmer must have a house 1 block wide and 1 block deep.
- The farmer must stay on the farm for no more than one day to plant a new crop.
Moments of implementation
When implementing, it should be taken into account that when a farmer settles on a farm, the game will create a new village in the area, so the farm must either be built outside the border of the existing village (and the future border of the village being created should also be taken into account), or kill all the inhabitants within a radius of fifty blocks. If several farms are planned (at least you will have two: carrots and wheat), then they should be located within the boundaries of the village being created.
The farmer's house must be equipped with a lock (two pistons blocking the door from the outside) and a system for supplying planting material inside the house (ejector in the wall of the house directed into the room and a funnel under the farmer's feet). Constipation should lock the house only during the day, so that a farmer who is late for an overnight stay can run into the house the next night.
Harvest should be collected with water in funnels. To do this, you need to build a reservoir and a piston system on one side of the farm. From the funnels, the harvest must fall into the chest, from where it must be fed to the farmer's house with funnels and ejectors, from where it must again fall into the chest.
Implementation stages
- We build a 2-bit counter on two triggers, or a counter on pistons that can count up to 4x. As a clock signal, we apply a signal to it from the 15th red dust block from the daylight sensor, switched to night mode. That is, the signal should come at midnight.
- We build a single-cycle timer (giving a signal for a strictly defined time and turning off). For this, a long timer on the funnels is suitable, working in tandem with a trigger (an external signal switches the trigger, which removes the blockage from the funnels, the funnels count the beat, switches the trigger, which gives a signal and blocks the funnels again). The duration of the applied signal must be sufficient for the ejectors to issue required amount planting material for sowing the field.
- We are building the farm itself, the farmer's house, a dam and piston dam, collection funnels and a system for transferring planting material to the house.
- We set the farm guards on combat duty, plow the field with a hoe
- Testing and fixing bugs
- We populate a resident.
Work algorithm
On the 1st, 2nd and 3rd day, the resident is locked in the house all day. The harvest is ripe. The most interesting begins on the night from the third to the 4th day:
- At midnight, a one-cycle timer kicks in. A signal is given to the dam pistons, the pistons let water into the fields.
- The harvest is carried by water into the funnels and fed into the chest.
- Simultaneously with the pistons, the timer sends a signal to the clock generator of the ejectors that supply planting material to the farmer's house. The signal is also sent to the funnel under the feet of the farmer so that the funnel does not immediately take everything away, so that the farmer has the opportunity to raise the seeds. You also need to send a signal to the locking mechanism (leave it closed), since most likely it will have the following closing algorithm: ((not day 4) and (not night time)). So we will finalize it to ((not day 4) and (not night time) and (harvesting works)).
- At the end of the timer, the locking mechanism of the house should turn off.
- During daylight hours on the 4th day, the farmer will plant a new crop in the sweat of his brow.
Automatic farm of wheat, carrots and potatoes using bone meal
A very fast farm capable of growing wheat, carrots and potatoes. Uses distributors to grow and ram to harvest.
By changing the recognition of light level updates in 1.8, it has become possible to create a much simpler and faster auto-farm on bonemeal in this version of the game.
This farm uses the absence of light above a block of wheat instead of a piston and water to harvest.
"Progressive" wheat farm
There is also a variant of the so-called "progressive" farm by the author. By appearance it is very different from the classic types of farms. In this case, 2 sources of water are used: the first serves to moisten the beds, and the second to harvest. The video below clearly demonstrates all the stages of creating such a farm. It is worth noting that, unlike the farm presented in the video, it is possible to create a larger sample (the size of the area for sowing is 9 by 9 blocks).
The mud block can be replaced with a piston on a redstone control, and the water can be opened remotely.
Video
Advantages
- Requires few resources to build
- Moist beds
- Spawning of mobs inside the farm is excluded
- Automatic fast harvest
- Planting a crop does not take long
- compactness
- Huge income from the area of 11 by 11 or 12 by 12 blocks that the farm occupies.
- Ease of construction
- Can't expand
- From an aesthetic point of view: objects hanging in the air. But this can be corrected by creating a frame that will support the upper structure.
In fact, you can build an automatic farm of any size, but when building large farms, it will not be possible to make a water system for delivering crops to the harvest point - you will have to manually harvest along the edge of the farm.
Wheat in Minecraft is a good resource. Of course, it is rarely used when creating any things. Basically, wheat is used to create bread and cakes. But how do you grow it? How to make an automatic wheat farm in Minecraft? The answers to these questions will be in this article!
Where can I get wheat seeds?
Wheat seeds, when compared with other crops, are the easiest to get. An inconspicuous grass that grows everywhere and is a source of seeds. When grass is destroyed (it is recommended to do it by hand), wheat seeds fall out. Drop chance is 1/15. For the first farm, you need to get at least 15-20 wheat seeds in order to then make an automatic wheat farm in Minecraft.

simple wheat farm
Still, for an automatic farm, you need a lot of seeds, and if you get them manually by destroying grass, then it will take a lot of time. But it is necessary and there is something in this period. Therefore, the best solution would be to first create a simple wheat farm, manual. In addition, when you get a lot more seeds than when the grass is destroyed. So, we need:
- Any hoe. There is no difference, it can be both iron and wooden.
- 10-15 wheat seeds.
- A little fence.
- Bucket.
- Light source (Glowstone or Torch).
- Flat field.
So, first you need to protect our future farm. The fact is that any mobs can trample your garden. The next step is to dig ditches for water, as wheat cannot grow in a dry bed. We fill the ditches with water using a bucket. We plow the field next to the ditches and plant wheat. Next, we make a path from any block so that it is more convenient to collect wheat. Well, lighting, as without it. Wheat cannot grow if the light level is below 9. You can, of course, put ordinary torches, but if you want to make everything beautiful, you can use lamps or glowstone. If you want to save space, then the ditches can be made small. One block of water makes 4 blocks next to it wet. That is, you can put a block of water in the center and already near it, within a radius of 4 blocks, use a hoe to plow the ground. Such a farm will make it possible to quickly collect seeds for an automatic wheat farm in Minecraft.

Automatic wheat farm
A simple farm is, of course, good, and the costs are small, but these are also small volumes. You can increase the production of wheat and the production of bread from it using an automatic wheat farm. In Minecraft, water can harvest. For example, if you have wheat growing and you put a block of water next to the field, the water will spread, thereby washing away all the wheat. Almost all automatic farms work on this basis. At first, a simple wheat farm is made, but in the form of a slide, so that in the future the water will wash away the entire crop in only one line. Then a block of water is placed, but it is blocked. And the block is controlled with a sticky piston. And this is how you get an automatic farm in Minecraft, which can give good volumes. Of course, using such a farm in a single player game is a bit inappropriate, since there is nowhere to put such an amount of wheat. However, if you play in multiplayer mode, then this use of an automatic wheat farm in Minecraft will be a great source of income for you, because wheat can be sold!
In this article, I will try to answer the beginners' question "how to create a wheat farm in minecraft". The farm will be the most ordinary, without automatic assembly, but with automatic irrigation of the land (the land will not dry out). The pros of such a farm are easy to create, beautiful to look at, given that wheat is easy to harvest, you won't waste much time creating wheat for food if you use a regular farm. Also in the article there will be the basics, I will answer the question of where to get wheat seeds, what tools are needed and show the necessary crafting recipes.
1. The first thing you need to do is collect wheat seeds. To do this, we beat the grass with our hands, it breaks off quite easily and from time to time wheat seeds fly out of it. In theory, 1 seed is enough for you, you can get a few more from it, more of them, etc., but it’s better to get more of them, at least 8 pieces.
2. You will need tools:
(desirable)
Bucket of water (highly recommended)
Hoe (required)
A shovel and a hoe can be crafted even from wood, and a bucket is made only from iron, at first you can do without a bucket and water, then you will need to constantly work with a hoe before planting seeds. Here are the crafting recipes:


You need 6 iron ingots or 3 iron ingots and 3 wood (stone, diamond, gold). To fill a bucket with water, go to the pool and right-click on the water while holding an empty bucket.
3. Find or create flat terrain with dirt (mud) and dig a 15×1 block hole with a shovel.

4. Exactly in the center of the pit (on block 8), pour a bucket of water, it should reach both ends of the dug pit.
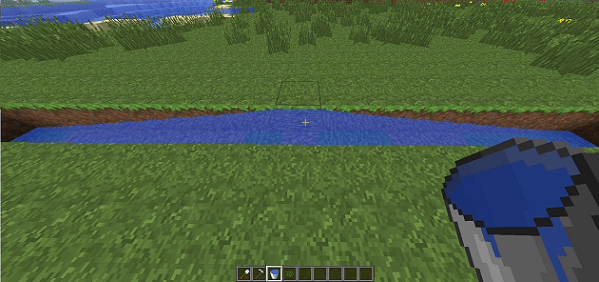
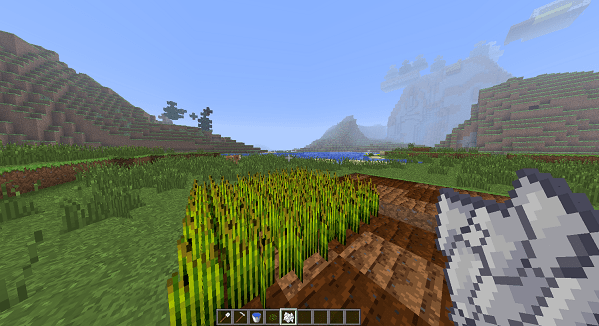
5. Use a hoe to work the ground on both sides of the trench with water with a range of 4 blocks, beyond 4 blocks the water will not affect the ground. Plant the seeds. The wheat farm is ready, it remains to talk about a couple of nuances that will help novice farmers.

When the wheat is ready, it will look like the image below. It can be harvested with bare hands, one harvested wheat will drop 1-2 wheat and 1-3 seeds.
It's important to know:
1. Wheat will grow instantly if it is sprinkled with bone meal. Bone meal is made from bones that can be obtained by killing a skeleton. With the help of bonemeal, you can very quickly create a large farm from several seeds.

2. If you jump onto a garden bed or walk on it several times, it will turn into ordinary land, so create fences from mobs, when playing over the Internet, it will not be superfluous to create walls and ceilings, as there will definitely be those who will not only trample your garden bed, but also fill it with water and lava.
3. When there is insufficient light, wheat seeds will "fly out" of the ground, put some torches or other lighting fixture if this happens.
It might be useful to read:
- Resume - a step towards obtaining the position of a tourism manager Resume of an assistant tourism manager sample;
- Some standards for project activities;
- Some standards for project activities;
- Filled sample resume for system administrator, IT specialist (example) Resume for the position of system administrator example;
- Sample Veterinarian Resume General Requirements for a Veterinarian;
- Key Responsibilities of a Bartender;
- Job Responsibilities of a Bartender;
- Sample resume of a PC operator Achievements in a resume of a PC operator;