Making knives from Damascus steel. Damascus, damask, wutz - technology. Required blacksmithing tools
Training video:
Usually professionals are engaged in making blades from Damascus steel or damask steel, but you can also try your hand at this fascinating process. You will need 10 double-sided hacksaw blades for metal. They are wider than one-sided and more convenient as a raw material.
Such canvases are made of U8 steel. When buying, try to find out how the canvases are made - entirely from tool steel, or used hard spraying on a soft base. Only the first are suitable for our purposes. Also, stock up on enough soft iron tape for upholstering wooden crates. Strips of any steel other than stainless will also be needed. Still desirable is V8. You can use old files about 2 mm thick, half the length of the hacksaw blade and the width of the iron band. You will put these strips in the bag as the outer layers, thus preventing the complete transformation of the thinner inner layers into scale.
You can also use softer steel as outer layers, such as StZ, but this will lower the average carbon content of your Damascus. Use an electric grinder or grinder to remove the teeth from the hacksaw blades. After this operation, they will become equal in width to the iron tape. Each blade must be cut into two equal lengths. You will have 20 pieces of hacksaw blade. Use metal scissors to cut 20 pieces of iron tape. Finally, it is advisable, using a pharmacy scale, to weigh a piece of iron tape, a piece of a hacksaw blade, and a plate of thick steel. You will need to know the weight when calculating the composition of the resulting steel.

Now let's do an operation called bundling a package. This operation is thorough and long, so it is better to perform it while sitting. Place a 2 mm thick piece of steel on the table. Its surface does not need to be cleaned of rust, but if it is a file, it is necessary to grind off its working surface. Moisten it with plain water and apply a fairly thick layer of borax (about 2-3 mm). An iron strip is placed on the borax layer, moistened, and a borax layer is applied. On it - a piece of a hacksaw blade, moistened, a layer of borax is applied. Thus, the layers of iron, borax and steel alternate until 5 pieces of hacksaw blade are used. On the top piece of the iron strip, place a piece of thick steel, the same as at the very beginning of the bag.
Now the package is very carefully tighten with clamps along the edges and, trying to prevent the borax from spilling out, weld its beginning and end with electric welding. Then, to reduce the possibility of delamination, weld in several places along the length. At the same time, pieces of steel wire or nails can be applied across the side surface of the bag and boiled. This will serve as an additional guarantee against delamination. In the process of welding, it is necessary to add borax powder to the places where it spilled out or flowed out when heated by electric welding. The final step in creating the bag is welding the handle to one of its ends. This will be a piece of reinforcement about 20 cm long when using the pliers, or 1 m when working without the pliers. Try to keep the handle welded as strong as possible.

If the handle falls off when the bag is heated in the furnace, it will be very difficult to get it out of there. When you succeed, most likely, the package will already be unusable due to burnout. It is even advisable to grind off one of the ends of the rod used as a handle to a small thickness and wedge it between the layers of the bag, and then scald it. As one of the layers, you can use a rod, forged into a plate at one end. Its long remainder forms a handle. This option is the most reliable. However, you should get 4 bags of the same design. The following technology can be used as an alternative to electric welding. The package is first assembled without a drill, after which through holes are drilled with an electric drill at the beginning and at the end of the package. Further, according to the above technology, the package is assembled with a drill and bolted through the drilled holes.
This technique is in some cases more effective, since it provides a reliable tightening of the bag. And with the use of electric welding, the package can fall apart in a hot forge. Some authors of the literature on Damascus steel advise to assemble the package without borax at all, which plays the role of a flux during welding, and sprinkle the package with brown powder already heated in the furnace. I would not recommend doing this for beginners. There may be places in the middle of the bag that the molten borax will not reach. Lack of penetration is formed in them. As you gain experience, you will become proficient when you can flux and weld a bag assembled without borax, but it’s better to be on the safe side at first. In addition, the use of the technology with preliminary filling of the borax makes it possible to put in the package steel with an uncleaned surface - with a layer of rust, scale, etc.

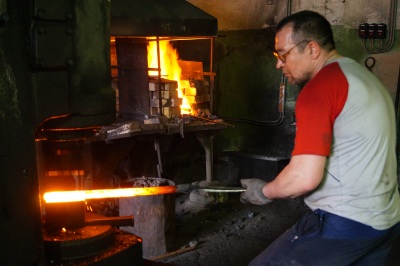
And in the latter method, all layers of steel must be thoroughly cleaned. So, you have assembled four packages. Examine them carefully - all the gaps between the layers should be tightly filled with brown. Make sure the long handles are welded to the bags as securely as possible. Light up the forge. When the flame is stable and the furnace is on full blast, carefully place the first bag in the mass of burning coals. It is very important that the bag is heated evenly. It must be constantly monitored, rotated around the longitudinal axis and moved if the heating is uneven. Remember that the workpiece in the forge appears to be hotter in color than it actually is.
It is very important to learn how to catch the only moment when you need to pull out and forge the workpiece. Usually the beginning of this moment is characterized by the appearance of small sparks, like a sparkler, which emanate from the surface of the workpiece.
Be alert - these sparks indicate that the maximum welding temperature is approaching and the metal is starting to burn. Wait for sparks to fly from the entire area of \u200b\u200bthe workpiece, and not just from any one area.

At this point, quickly remove the workpiece (its color should be from lemon yellow to white, with an abundance of sparks). Place it on the anvil, and with frequent blows with a small sledgehammer, pierce from end to beginning and back again. Flip and pierce again from end to beginning and back again. If all goes well, the welding has already taken place. To be sure, strike the workpiece with even flat blows until it reaches red. Forge welding is possible at and at lower temperatures, for example, with a light orange glow of the metal, but the risk of cold lack of penetration increases.
If the shape of the workpiece after this series of forging is not perfectly rectangular, heat it again, just to orange. Correct the shape of the workpiece so that it is as close to rectangular as possible, and both surfaces are as flat and even as possible. The thickness of the workpiece after this, the first welding, should be about 4-5 mm. In this way, pierce and weld all four packages. After that, the four obtained plates can be reassembled into a bag and welded, but I recommend stopping, taking a break and at the same time examining the quality of the weld done. When the forgings are cool, grind off a small layer of metal from the side plane of the package with a grinder or electric grinder.

If you only see the shiny surface of the solid steel, the weld was successful.
When dark lines are visible - the boundaries between the layers, it means that lack of penetration was allowed. With one or two small lack of penetration, the process can be continued. Most likely, delamination will not occur, and lack of fusion will be eliminated during further welding. If the lack of fusion is large, then the package should be heated, the uncooked place should be covered with a layer of borax, continue heating to the welding temperature, and the uncooked place should be forged over the entire width of the plate again.
So, you have in your hands four plates of 13 alternating layers. Having collected them in a bag and boiled, we get a plate of 52 layers. While hot, cut it lengthwise with a chisel into 2 or, if the width permits, 3 parts. While the process of chopping with a chisel scares you, you can cut the plate with a thin cut-off wheel, however, some metal will get into the sawdust. By collecting and welding the resulting plates, theoretically, you can get any number of layers. But it should be borne in mind that initially rather thin layers of metal were laid in the package, therefore, with the number of layers more than 200, the pattern will be very thin and difficult to distinguish.
Therefore, I recommend sticking with 150-200 layers. For final welding, try to make the bag shorter in length and width, but thicker than what you have planned for the future product. This is necessary for the final metal forming process. So you've got your original piece of Damascus steel. It contains about 0.6% carbon - the Japanese consider such steel to be optimal. This is the so-called "wild" Damascus. When etched from it, you will get a pattern of almost parallel lines of varying thickness. This damascus is also called "striped". You can be satisfied with it, or try to somehow complicate the pattern.

Option one: "PAVLIN'S EYE".
This is a pattern that contains concentric circles, ovals, or squares. The pattern is achieved in the following way. Before forming the product from the obtained plate, on its lateral surfaces with a drill or a grinding wheel, in the right places, shallow (1-2 mm) depressions of a round or elliptical shape are cut. After that, the heated plate is forged, in which its surface becomes flat again. In this case, the lower layers come out to the surface and form concentric shapes. The use of this method gives quite ample opportunities when forming a pattern.
A fundamentally different way - "TURKISH" or "TURNISH" Damascus.
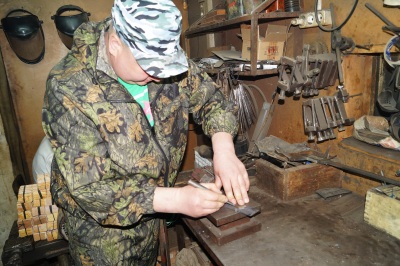
To obtain it, you should try so that the source material, a package with the required number of layers, takes the form of a round or square bar. To do this, you can cut a wide thick plate or cut it lengthwise into strips, the width of which is approximately equal to the thickness. The rods are heated to a light orange color, after which one end is clamped in a vice, and the other, is grasped by pliers with flat jaws.
It is twisted along the longitudinal axis in several turns, but so that the bar does not burst. The resulting spiral-shaped workpiece is forged into a plate, at a temperature close to the welding temperature, with a flux meter in order to eliminate possible delamination. The product formed from such a plate has a complex pattern in the form of concentric four-pointed repeating stars. When working with Damascus, there are a huge number of pattern options. There are no limits to artistic fantasy. Therefore, do not be afraid to experiment and look for new patterns and ways to get them. We will touch upon this topic in the section dedicated to mosaic Damascus.

Welded damask steel:
This type of welded steel is characterized by a high carbon content, which brings this Damascus closer in strength and cutting properties to cast damask steel. This carbon content is achieved by using cast iron powder in forge welding. Cast iron contains up to 6% carbon. It is convenient to use cast iron from steam heating batteries, but its quality is not high. In any case, you should know the composition of the cast iron used, at least the data on its carbon content.
Cast iron is very fragile, so it is quite easy to split it into small pieces with a sledgehammer. Then crush them on an anvil into a powder, the particles of which should be about the size of a grain of rice. Cast iron must be crushed carefully so that the particles do not fly in different directions. For the required amount of welded damask steel, you will need several glasses of crushed cast iron, so please be patient. In addition to cast iron, such steel includes StZ in the form of water pipes and U8-U9 steel from files.
The file steel should be cut into pieces about the size of a fingernail. She easily pricks with a hammer. Using the above formula, calculate the parts by weight of all components. Finished steel with all carbon burn-off corrections should contain no more than 1-1.2% carbon. Homogeneous steel with such a composition is very fragile, but due to the heterogeneity of the composite, it becomes possible to harden it to a high hardness. Take a 1/2 or 3/4 inch water pipe - this, as I said, is StZ steel.

You will need several pieces of pipe about 20 cm long. Using an iron wire brush, carefully clean the inside of the pipe to remove any rust. Tightly weld one end of each piece of pipe. Mix crushed cast iron and fragments of U8 steel in the proportion you calculated (when calculating, do not forget to take into account the weight of the pipe). Usually, U8 by weight is required more than cast iron. Now fill the pipe sections with the mixture. Compact the cast iron / steel mixture as thoroughly as possible with a pin that is suitable for the diameter. The stuffed mixture is rammed in the pipe by tapping with a hammer on a pin inserted into the pipe like a piston.
When the pipe is full, weld on the other end and weld the handle to it. You can use the pin with which you tamped the mixture, leaving part of it in the pipe and welding it firmly. After filling all the pipe sections, take an electric drill and drill 10-20 small diameter holes in each pipe, evenly spaced them over the surface. These holes are needed to release the remaining air and excess molten iron. Fire up the furnace and heat the pipe section to the maximum temperature. In this case, a small burnout of the pipe surface is not terrible, since the pipe walls are quite thick.
Make sure the heating is even. When the pipe segment turns white, pierce it with a heavy sledgehammer (the help of a hammer is desirable) several times from end to beginning and back. Bring the resulting plate to a thickness of 3-4 mm. In the same way, cut off the rest of the pipe sections. In the resulting steel, there are still a lot of internal lack of insulation, voids and its composition is very heterogeneous. Therefore, you will have to weld the resulting plates many times. Weld them together first. The resulting plate must be divided in two alternately along and across and the welding must be repeated at least 10 times so that the steel becomes even in composition. At this stage, I advise you to gradually start mastering one technique.

It will avoid the procedure of cutting the plate into pieces and assembling into a bag using electric welding. The plate is cut with a chisel along the desired line by 1/2 of the thickness. Then, on the edge of the anvil along the notch line, the plate is bent 90 degrees. On the plane of the anvil, the fold is brought to an acute angle. After heating, the bent plate is carefully fluxed with brown, especially those surfaces that will be welded. After applying the flux, the forging is heated to the welding temperature and forged. In fact, the plate simply folds in half. It must be remembered that it is folded alternately - then along, then across. Suppose there were five pieces of pipe that you forged into plates. Welding them together, we got a 5-layer package.
After the first folding in half, it will have 10 layers, after the 2nd - 20, after the 3rd - 40, after the 4th - 80, after the 5th - already 160! Thus, after the 10 welds I recommend, you will have several thousand layers. It is already possible to form a finished product from such a package. I do not recommend using any tricks to complicate the pattern on welded damask steel - it already has its own, unique characteristic chaotic pattern. You can read about the peculiarities of the welded damask steel hardening and the amazing technology that allows you to achieve the formation of microscopic diamond crystals in the layers of such steel in V. Basov's article "Bulat - the life line". Mosaic "Mosaic Damascus" is a steel in which areas with different types of patterns are welded together. The possibilities for imagination are endless here. I propose to make a damascus with a Sutton Hoo smoke pattern, after the name of a Scandinavian fossil sword.
Weld a package consisting of 7 layers of three steels - StZ (gives a white metallic color when etched), U8 (black) and any spring steel (gray). The alternation can be anything. The finished plate should turn out to be wide and thick enough so that 8 square bars with a thickness and width of about 7-8 mm can be chopped from it. You may need to make several plates. The length of the rods should be about 30 cm.After that, mark on each of the rods 4 cm sections.Heating and clamping the rods in a vice, according to the obtained marks, twist half of the rods in one direction (say, clockwise), and half in the other.

Twisting will occur in sections, so that the twisted sections alternate with non-twisted ones. Try to keep the twisted and non-twisted areas on all bars in the same places. After that, pierce each bar again, restoring their square section along the entire length. Now take four rods - two twisted in each direction. Fold them sideways on a workbench, making sure that the layers of metal in each bar are facing you. The twisted sections will touch and alternate. A bar twisted clockwise next to a bar twisted counterclockwise, and so on.
You will end up with a bag that looks like folded fingers. Place a few thick nails across the bag on each side - they can then be removed - and weld with electric welding, securing the bag. Also weld the rod-handle. Since the thickness of the package is small, it is possible to flux directly before forge welding. Heat the bag until scarlet, sprinkle thickly with brown on both flat sides, and heat further. Welding is carried out at the highest possible, but excluding burnout, temperature, very light (in order to prevent the bundle from stratifying in the form of a fan) with hammer blows. They are applied along the side of the bag, not over a wide plane. This art of butt welding is not easy to master. At first, it makes sense to practice on square bars of steel, so as not to spoil the complex layered steel.

As a result, you should have two monolithic plates. Each consists of four sections of bars twisted in opposite directions. By itself, such steel is not very strong, so it should be welded onto the base. The base can be either damask or simple (in this case, the best option is a plate made of a tempered and forged spring). It should be the same size as the resulting mosaic plates. The base is collected in a bag with the resulting plates and welded together. It turns out a finished piece of steel, the surfaces of which have a beautiful pattern, similar to the smoke from a candle.
A product from such Damascus should be forged very carefully, trying to achieve the most approximate shape precisely by forging. When turning with a grinder or on a wheel, the pattern may deteriorate. Start grinding work only when the shape of the future product is indicated in almost all details. Take care of the uniform deformation of the metal during forging so that the core and the outer patterned plates do not move relative to each other. Making a mosaic, or any other Damascus, is fascinating. For the pleasure of steel, unique in its beauty and properties, it is worth looking for your own ways, and not to be afraid to start over again again and again.
Damascus swords have been famous for their unique qualities for many hundreds of years. To forge such a weapon required the art of a true master. But art alone was, of course, not enough. It was required to create the steel itself. So what is she like? As many people know, Damascus is called multilayer steel. Moreover, if there is no difference in the carbon content between the layers, as well as there are no alloying additions, such steel does not belong to Damascus. Steels are completely different: springy and alloyed, and with a high carbon content. Three types of steels or alloys alternate in the package: one is rich carbon steel, others can be manganese, sometimes ball bearing steel is used, and the third material in the package is pure nickel. It gives shine, does not etch when finished blades are etched with acid, and forms shiny layers in the pattern.
The cut strips are folded one after another and welded into a bag by electric welding so that they do not crumble. The bag is placed in a furnace, heated to the required temperature, which, by the way, must be observed with exceptional precision. The fact is that if the temperature is slightly lower than required, the steel will not weld (lack of penetration). If it is excessively overheated, the metal will begin to burn, and when the overheated steel crumbles into dust from a strong blow, it can no longer be collected, it can be thrown away. And with very strong overheating, steel generally flares up like a sparkler. Damascus is distinguished by its specificity. The pattern that is formed "by itself", in the process of forging, folding and forging a bag, is called "wild damascus". And it is considered one of the most durable Damascus, there are no mechanical defects in it.

Stainless Damascus is cooked in a vacuum oven. A vacuum furnace is a very complex, bulky and, therefore, expensive equipment. A furnace is located in the vacuum chamber, and to be more precise, an induction heater, a pneumatic or steam hammer and a manipulator that allows you to move the workpiece (you cannot work with your hands there). The uniqueness of the cut Damascus steel blades lies in the fact that in the process of their manufacture it is possible to purposefully form a pattern. Such blades are obtained with very beautiful peculiar patterns. This is achieved by cutting grooves after forging a knife blade, and then expanding them in order to prevent pinches and forging again, strictly observing a certain temperature regime. The pattern in the form of rings is formed because the layers in the grooves lying from the bottom bulge upward. There is also a technology of torsed, or twisted damascus, when, after forging, the package is twisted around the longitudinal axis and forged.
Often, several twisted blanks are welded into a plane, and then an amazingly beautiful pattern is formed, which is called a bouquet pattern. The price of such knives is especially high and can be calculated in six or even seven figures. Even lasers are used by Western blacksmiths. Can you imagine a blacksmith with laser equipment ?! The laser cuts an extremely narrow groove in the workpiece, into which a strip of metal is inserted, and then the workpiece is forged to produce the desired pattern.
You can forge anything - numbers, initials, even a portrait! Of course, very expensive handles are also selected for such exceptional knives. In particular, various valuable types of wood, bones. In addition, they are richly encrusted.

I present to your attention a high-quality stylish knife made of Damascus steel, which you can make with your own hands. Damascus steel is a steel that is heterogeneous in its composition. This is achieved by forging where different grades of steels are mixed. And if such a metal is then immersed in acid, a unique pattern is formed on it, since each steel changes its color in different ways.
In this tutorial, we'll look at how you can make your own Damascus steel. More modern technologies will be used here. We get Damascus by dismounting two or three types of steel. As a basis, steel powder will be used here, as well as steel balls. It is thanks to the balls that we get an interesting pattern. In principle, the forging process is not difficult, but it requires a forging furnace, an anvil, and some experience. Working with hot metal is very dangerous, so all safety rules must be followed. So, let's move on to making a knife!
Materials and tools used by the author:
List of materials:
- steel tube (preferably carbon steel);
- steel balls;
- steel powder;
- some sheet metal for the plugs;
- wood for linings;
- brass rods or bushings for pins;
- oil for wood impregnation;
- epoxy adhesive.
Tool list:
- blacksmith's furnace, anvil and hammer;
- belt sander;
- acid for pickling steel;
- grinder;
- drill;
- welding machine;
- vernier caliper;
- oil for hardening, electrical tape and others.
Knife making process:
Step one. We form the workpiece
First of all, from balls, steel powder and a piece of pipe, we need to make a blank, from which the blade will then be made. To do this, pour powder and balls into the steel pipe. You need to fill up in portions, that is, a little balls, then a little powder, and so on. The balls must first be washed well in soapy water so that there are no traces of oil on them. You can also rinse them in acetone. We weld the bottom of the pipe using steel round timber.
As for the metal of the pipe, it is desirable that it also be carbon steel.


Well, then we brew the other end and send the whole thing to the oven. You need to warm it up to a yellow glow and with this heating we perform forging. We crumple metal from different sides. It is extremely important for us to mix all the metals together. You will need to heat the workpiece more than once, but in forging it is never easy. After that, we get excellent metal for the knife.
Step two. Checking the metal
When, in your opinion, the workpiece is ready, you need to check the quality of the metal. First, we take a grinder and cut off the edges of the plate. The metal must be uniform, free of cavities and other defects. Further along the contour we go through a belt sander. Similarly, we see if we mixed the metal well. If everything is fine, you can proceed to the next step - forming the profile of the knife.


Step three. Blade profile
The author sets the blade profile by forging. First, we form the tip of the knife, and then we can make bevels on the blade. We approach the formation of bevels responsibly, the blade should be even, but not too thin. There is no need to rush in this matter, we work with a hammer on both sides.
Finally, you will need to separate the blade from the handle. To do this, we work with the sharp part of the hammer. If everything is fine, make sure your blade is straight. This completes the forging.


Step four. Blade grinding
Having formed the primary profile, you can proceed to grinding. These tasks are most easily handled with a belt sander. We thoroughly grind the entire blade, both plane and along the contour. Do not sharpen the blade at this step; its thickness should not be less than 1 mm. Otherwise, the blade may deform or crack during hardening.


Step five. Heat treatment of metal
Perhaps this step is the most important in the manufacture of a quality knife. Thanks to heat treatment, we can make the metal from which the knife is made to be as hard as possible. The temperature regime for each steel grade is individual, but if you do not know what kind of steel, you can follow the basic rules. For example, if the metal is heated to the hardening temperature, the permanent magnet is no longer attracted to it. But this method is not accurate. Also, many craftsmen know how to determine the desired temperature by color, for most steels it should be yellow.


The first thing the author does is normalize the metal after forging. To do this, it must be warmed up and allowed to cool gradually. The author places the blade in a bag of charcoal and sends it to the furnace. Further, the workpiece can already be hardened, for this we heat the blade again and immerse it in oil. The procedure can be repeated several times, but usually once is enough. If after that the blade is not taken with a file, then the steel is hardened.
However, there is one pitfall here, if after hardening the steel is not released, it will be brittle. That is, we need to make the metal a little softer so that it bounces and does not break. A household oven is enough for this. It needs to be warmed up to a temperature of about 200 ° C and the knife should be heated for about 1-1.5 hours, depending on the thickness of the metal. If the vacation is successful, the blade should turn straw-colored. Your knife will now be able to withstand enormous bending loads as well as impact loads.
Step six. Grinding and drilling holes
After hardening, there will be a deposit on the metal that needs to be cleaned off. We put a not too large belt on the draw frame and grind it. If desired, the blade can be made shiny like a mirror.


We also need to drill holes for the pins in the handle. But it is very difficult to do such a procedure with hardened metal. In this regard, we take a gas burner and warm up the handle. Let it cool down gradually. After that, the metal will be drilled with conventional metal drills. That's all, now it remains to make a pen. Wrap the blade with electrical tape or masking tape so as not to cut yourself during subsequent work.
Step seven. Prepare the overlays
The overlays can be made of various materials, it can be plastic, textolite, bones, horns and much more. In our case, this is the most popular and demanded material - wood. We select a board from a beautiful wood with a beautiful pattern and make two overlays. If desired, some other material can be glued to the pads so that the handle is combined.


Step eight. Blade etching
Since our steel is Damask, we need to remember to highlight the same cherished pattern. To do this, we need a reagent that actively reacts with steel. We clean the blade with sandpaper, clean it with acetone, otherwise the fat will not allow the acid to work. Well, then we lower the blade in acid for a while. But do not forget about the knife, as the steel can completely dissolve the blade. We take out a knife and rinse it in water with soda, it neutralizes the acid. That's all, now we have a fancy, unique pattern on steel.
greetings to all brainwashers! After almost a year of "communication" with a rock and a hard place, I finally gained the necessary experience and tools to create forged handicrafts, such as a small "Damascus" knife from this brain articles.

And I started, by the way, with a small sledgehammer as an anvil, which I hit with a small hammer.
Now we will talk about creating a small, forged, and not carved, knife with your own hands with the help of a homemade forge, anvil, hammer and determination. I do not pretend to be a professional, and this, of course, is not the only way to obtain welded damask, this is a story about how I managed to make it.
Damascus steel today is called welded Damascus, obtained from welded metal plates of various brainsteel, subsequently hammered and twisted. It's like sticking together different colors of plasticine and twisting it to create a wavy pattern. After forging, such a workpiece is etched, in which the dissimilar metals of the workpiece are eroded unevenly, thereby forming a beautiful contrast. The original Damascus steel is obtained in a different, very specific way (although it looks like modern Damascus), and few people know how to create it, this fact has created a reputation for Damascus as a metal, supposedly endowed with magical powers. And the reason for this "strength", which is similar for samurai swords, is a process that allows you to get more homogeneous, and therefore with the necessary qualities, steel, which cannot be achieved by other methods, and makes it possible to include low-quality and high / low carbon steel in the workpiece. Which gives a much better quality blade.
ATTENTION!! A knife can be dangerous, please do not give it to people with mental disorders !!!
Step 1: materials and tools
- steel plates of two or more grades (preferably high carbon content) that will contrast with each other, I took high carbon 1095 steel and 15n20 steel, with a small nickel content, which will add brightness and contrast after etching
- flux (borax, which can be purchased at the hardware store)
- a piece of reinforcement, a long bar (will be welded to the workpiece as a handle)
- wood of your choice for the knife handle
- epoxy resin (hardening in 5 minutes is the very thing)
- brass rivets
- composition for processing wood of the handle, I used linseed oil
- metal hardening oil (vegetable)
- ferric chloride
- an anvil (preferably a real steel anvil, although in the absence of one, some other solid objects will do: a piece of rail, a sledgehammer, a large metal blank, an old mooring post "bollard", or just a large solid, solid and level surface. Remember how it all started with blows with a stone on a large stone)
- hammer (I used a weight of 1.3 kg, with a transverse firing pin)
- ticks
- welding (optional, but desirable for welding the plates to each other and welding the handle, if you do not have welding, you can wrap the plates tightly with wire)
- a forge (capable of heating the workpiece to the temperatures required for forging, which is very important for high-quality fusion of the plates with each other, more on this later)
- belt sander or file with a mountain of patience
- oven or other hardening method
- drill or drilling machine
- vice (very useful thing)


Step 2: Assembling the workpiece


Steel plates are cut according to the required brain size, mine for example 7.6x1.2cm; however, the larger the workpiece, the more difficult it is to shape it with a hammer. Before welding them into a stack, the plates are cleaned from all sides of rust and scale. Then the plates are stacked, alternating steel grades, so my workpiece consisted of 7 plates, three of which are 15n20, and four - 1095.
The plates aligned relative to each other are tacked by welding (do not pay too much attention to my seam), and then a handle is welded to the stack to make it easier to handle the workpiece during forging. There is nothing wrong, especially after the stack of plates has been welded, in using only pliers. I forged mine anyway.
Step 3: Forge the first stack


A little about my forge: it is made do it yourself from an empty (for precaution, I specially bought a new one) gas cylinder, inside it is lined with a 5 cm layer of kaolin wool and refractory cement. It is heated with a Ron-Reil burner, about which there are many good brainworms... The forge itself is not very large and heats up to the desired temperature without any problems.
So, the blank from the plates is heated to a cherry-red color, the heat is not very strong for this. Heated workpiece homemade brown, which immediately begins to melt and must be allowed to seep between the plates. This will remove scale and prevent oxidation by preventing oxygen from contacting the metal. This action will keep the workpiece metal clean.
Then the workpiece is reheated in the furnace and the procedure is repeated a couple more times, remembering to clean the scale if necessary. And after that, the workpiece is heated to the forging temperature, how much I can't say for sure, but I think, somewhere in the region of 1260-1315 degrees Celsius. At this temperature, the workpiece will have a very bright yellow-orange color, similar to moderate daylight.
To avoid wasting time, make sure the anvil and hammer are close at hand and there is enough free work space.
Then the workpiece is quickly placed on the anvil and with light, soft blows, evenly over the entire area, the plates begin to squash together. Then the workpiece is again placed in the forge and heated to the forging temperature, and then forged with medium-force blows.
And after that, the workpiece is pulled out so that it can be bent.
Step 4: fold the workpiece


It's time to increase the number brain layers in the workpiece. To do this, the workpiece is forged to a length twice the original, but it is important to stretch it evenly, and not just stretch it. In the middle of the stretched workpiece, a transverse depression 3/4 or 4/5 in thickness is made on a sweep, chisel or other suitable method, along which the workpiece is then folded in half at the edge of the anvil, turned over and forged along its entire length, while making sure that the halves are not moved relative to each other along the side edges.
Then the heating / forging process is repeated from the previous step: flux, heating, cooling, heating, forging, forging. The procedure for increasing the number of layers is repeated until the required number of these layers, so I folded it 4 times and got 112 layers. (If you want more layers, please, the pattern will turn out smaller. The formula for calculating the layers is as follows: the initial number * 2 in the power of the number of folds, that is, 7 * 2 ^ 4 \u003d 112).
Further, the billet heated to the forging temperature homemade is placed in the anvil groove, twisted well, and then it is again given a rectangular shape. But before twisting, the workpiece is punched through the corners in order to make its shape more rounded, because when twisting and reverse forging into a rectangular workpiece, inclusions and impurities from the resulting folds can form if the temperature of the workpiece is less than forging.
After that brain procurement it is forged again (I repeated it several times), and it is cooled, and to make sure that the forging is uniform, I cleaned one of the ends of the workpiece. During the forging itself, especially at the first stage, it is important to keep the temperature of the workpiece high and be careful, otherwise you can tear the layers apart (otherwise this is called delamination, which is not good at all).
Step 5: model and rough profile shaping


Now you need to imagine the profile of the future knife and roughly forge it from the workpiece. The more accurately you can forge the profile and bevel, the less you have to mess with grinding (on a machine or file). There are many brainworms more experienced blacksmiths, so I will not go into details. The bottom line is that the workpiece behaves approximately like plasticine, when it is heated, it is necessary to punch it in the right direction.
Step 6: sanding the profile


The final shaping of the profile is carried out with a grinder and a file. Stock up on tea, because most likely it will take a long time, unless of course you have a grinding brainworm.
Step 7: Sanding, Sanding, Sanding ... and Reflecting on the Meaning of Life


Step 8: finished profile


After profile crafts formed, it still needs to be finalized with a file with a finer grain, I used 400s. The edge of the blade is sharpened almost, but not completely, it is necessary to leave it slightly not sharpened so that the material of the edge does not deform during hardening. After that, holes for riveting are drilled in the knife handle and wooden dies for this handle are prepared.
Step 9: thrilling moment


Hardening.
It will either "create" your blade or destroy it. It is important to concentrate and be careful, otherwise the blade may deform and shatter. The method I used is not the most thorough method. brain-hardeningbut it was the only one available to me with the tools I had, and the oil was the best I could get.
Before hardening, the blade must be normalized. This will remove the stresses built up during forging and twisting and reduce the chance of warping during quenching. This normalization is done by heating the blade above its critical temperature (when it is no longer magnetized, so it is useful to have a magnet on hand) and air cooling. The process is repeated three to five times, so I did it 5 times. In addition, this action will help you practice removing the blade from the forge, because no hitching is allowed during hardening. This action is shown in the photo with my dangling knife. And this part is cool in that during cooling, oxidation occurs, which begins to reveal the pattern of steel.
Hardening: the blade is heated again above the critical temperature, and then quickly removed and placed, first of all with a sharp point, in warm vegetable oil (for such brands brainsteel like mine). To heat the oil itself, you can simply heat up something metallic and throw it into a container of oil, for example, I used a crutch for sleepers. Stir the oil to get a smoother hardening. If your steel is high carbon, then do not use water for hardening, it will only ruin the blade, because water cools too quickly, which is not suitable for high carbon steel.
FROM under the tree now you should treat it like glass because if the blade has been hardened correctly it is so brittle that it could crack if dropped.
After that, it is the turn of the vacation.
Step 10: metal tempering
Tempering is the process of hardening a blade to increase its durability and strength. This is achieved by heating the blade at a certain controlled temperature. Leave your brainwashing I spent in the oven for an hour at 205 degrees Celsius. “Bake” until the display shows “ready”.
Step 11: etching

I apologize in advance for not having a photo of this and the next steps, but the process is quite simple. Ferric chloride is prepared according to the attached brain instructions, and then the blade is held in it, as long as indicated in the same instructions. In my case, this is 3 parts of water for 1 part of ferric chloride, and aging for 3-5 minutes. The process is really exciting, and its result looks like it's a Batman knife.
Step 12: handle and sharpen


Again, there are many techniques and instructions on how to how to do handle the knife and sharpen it, so I can do without brain details... I will only say that for my crafts I chose cherry dies, which I glued to the knife handle with epoxy glue and secured with two brass rivets. I sanded it with 400 grains and covered it with linseed oil.
For sharpening, I do not use any special, demanding method, but mainly use an ordinary sharpening stone.
Step 13: It's time to pat yourself on the back, the knife is ready ...


This is my finished knife, about 15cm long. People might find this quite funny, but I have no idea how this fancy pattern came about.
Thank you for brainwave, I hope this is useful to someone!
The famous Damascus steel. What qualities did these amazing blades possess? What is the secret of ancient technology? Damascus for its time was a revolutionary breakthrough in the creation of high-strength metal and new technology. The legendary swords that cut through the silk scarf had an extraordinary sharpness. Isn't it a myth? The forge of the twenty-first century is the realm of traditional technologies. The principle of creation has not changed for centuries. The main elements of this production: open fire, hammer, anvil, the skill of a blacksmith. A sign of a new era in the blacksmith profession is the source materials. In the old days, artisans mined ore themselves, then processed it into metal. Modern blacksmiths, as a rule, operate with steel with alloy additions. These impurities give the metal its individual characteristics.
The superiority of Damascus steel over all other alloys is a common myth. Scientists believe that it is a figment of the imagination of writers of the early nineteenth century. In the historical novels of that time, the blades of Damascus had wonderful properties. They cut like butter. Historians and metallurgists refute these legends. Old Damascus would hardly have been able to resist modern steels. It, nevertheless, was somewhat simpler in chemical composition and the steels that were used in it were not so interesting. The "Damascus" that today's craftsmen create is, as a rule, the use of, already, initially high-strength steels with good characteristics.
Nevertheless, the "Damascus" of its time was really distinguished by its high strength and flexibility. This combination made Damascus steel an excellent weapon. The secret is in a special alloy.
In its pure form, iron is a very soft metal and is not suitable. Therefore, a person uses alloys - compounds of iron with other chemical elements. An indispensable component of these compounds is carbon. It gives the alloy its hardness. For example, in usually a nail, carbon is one hundredths of a percent (0.06-0.16%) of the total metal. And in a railroad track from 0.5 to 0.7%. Iron alloys containing less than 2.14% carbon are called steel. After special heat treatment, it acquires another important quality - elasticity.
The main secret of the "Damascus" production technology is a multilayer billet, which consists of alloys with different carbon content. Damascus steel is one of the first composite materials in history. "Damascus" is a welding technology when there is a diffusion convergence of layers of two, three or more steels by pressure. The main part of the package, which consists of steels rich in carbon, gives special hardness to "Damascus". The source of elasticity of the future product is alloying additives and iron. So, the alternation of layers of metal with a very high and very low carbon content, gave the new material: hardness, elasticity and toughness (resistance to shock loads).
Traces of this cocktail can be seen with the naked eye. The characteristic pattern on the "Damascus" blade is the optical effect of uneven carbon distribution. "Damascus" has its own unique "face", its pattern, its beauty in iron. The homogeneous material is even in color, not so interesting. He, as a rule, is painted, or to create some kind of image.
The high qualities of a particular blade made of Damascus steel are laid down at the initial stage. There is no perfect recipe for creating a "package". The selection of raw materials, their proportions, the principle of combination, in ancient times, any of the elements of this process, was the master's secret, the foundation of the superiority of his weapons.
Damascus steel is the pride of any hunter. Thanks to the manufacturing technology, such a tool cuts the hardest natural materials and fabrics. It holds the edge well. However, the product of these craftsmen is rarely used for its intended purpose. The main function of their steel works is decorative.
Good day, dear readers. Customers of our online store quite often asked us questions regarding various grades of steel, so we decided to prepare informational reviews on knife steels presented in our range. We decided to prepare the most detailed photo report about the technological process starting from a metal bar (billet) and ending with a finished knife about Damascus steel, since it has significant differences from most steel grades.
According to Wikipedia, Damascus (Damascus steel) is a type of steel with visible irregularities on the steel surface, most often in the form of patterns obtained in various ways, for example, by repeatedly reforging a steel package consisting of steels with different carbon content (welding damascus).


In the photo (from left to right): a modern knife, a product of ancient craftsmen, damask steel.
Damascus steel is associated with many legends and is strongly romanticized in classical literature and historical chronicles along with damask steel. I will not argue that we rediscovered the recipe invented a thousand years before our era, but using knowledge in modern metallurgy and conducting a large number of experiments, we got our own recipe for Damascus with a blade hardness of 62 units on the Rockwell scale (HRC).
For those who have already tired of reading the article and who want to ‘see’ once, not hear a hundred times ’, a small video clip about the workflow from our smithy.
The workflow for making a knife is divided into two stages: making a damascus in a forge and then processing the blade in a knife workshop. You can familiarize yourself with the production of steel in the forge in our video, as well as in the photo report below with comments.
Damascus forging in the forge
Damascus production can take place in several different ways, we produce the so-called ‘welding damascus’ ’. This technology implies a set and welding of workpieces (hence the name welding) from various grades of steels, soft and hard, which makes it possible to achieve the necessary characteristics for good cutting properties of the blade.


In the photo (from left to right): set and welding of a package of steels, twisting of a loose package, forging a package of steels with a hammer.
Damascus is not a pure metal found in nature, but consists of a package of steels, selected by us as a result of a large number of tests. To create it, we use a package of four steel grades (ShKh-15, KHVG, U8A, steel-3), each of which is necessary to impart the necessary cutting properties to the final product.
Let's move on in more detail to the technological process itself. After the workpiece has been prepared from a package of steels, it must be heated to a bright red color, after which you can proceed directly to forging. The forging process is repeated three times, the thickness of the forged strip at the first two stages does not have a clear regulation, and at the third final stage it is made as close as possible to the thickness of the butt of the final product, in order to avoid unnecessary metal consumption and lengthening the processing process.
Next, the workpiece is given a rectangular shape for the next technological process - twisting. The fragment directly with the twist did not get into the video, but there is nothing particularly complicated here, the red-hot workpiece is twisted in a spiral, for the number of revolutions that can be achieved, before the metal hardens - as a result of which the shape of the workpiece changes from rectangular to cylindrical ( you can see the uncoiling of the twist on the 10th minute of the video). The texture of the pattern on the blade depends on the number of twists.
In addition, I want to draw your attention to such a moment in the technological process as brown sprinkling (white powder), which is used during the forging of the workpiece after twisting to pull out slag and scale, which avoids the appearance of fistulas and lack of penetration. After that, a strip of metal is obtained, from which the blades will be made directly. We now turn to the workshop, where a knife will be made from the strip, well, and a few more photos from the forge, in the end.


Knife making process in the workshop
We have already visited the forge and saw how stripes are made from Damascus, now let's see what happens next with them.
First of all, it is necessary, using a special pattern, to circle the contour of the future blade on the workpiece, cut it off from the strip of metal forged in the forge and cut it along the contour.


In the photo (from left to right): marking the workpiece, the workpiece and the pattern, cutting along the contour.
Forging metal using a mechanical hammer allows a slight difference in the thickness of the metal in the forged plate, therefore, it is necessary to align the blade along the plane. After that, the blade is given the geometry according to the pattern and the drawing, just at this stage, for example, an incision is made using the biconcave lens technology.


In the photo (from left to right): cut out workpiece, alignment on the plane, giving geometry to the blade.
After the above actions, we get a blade that is already quite close in appearance to what we are used to seeing on store shelves, but rather rough looking and without a pattern. The blade must be sanded, which is called to a mirror finish. Next, a workshop stamp is applied (the area for stamping is preheated) and holes for rivets are made, if all-metal mounting is provided.


In the photo (from left to right): grinding, stamping, drilling holes for rivets.
Not a single blade will have the declared properties if it is not hardened. We proceed to the next stage of thermal hardening. The blade is hardened in a heat oven at a certain temperature and gets a blade hardness of 62 HRC on the Rockwell scale. After that, the surface is cleaned on a sanding belt from scale and the blade would have become a finished product, if not for one small but - there is no pattern. The pattern that makes Damascus - Damascus, manifests itself when the blade is exposed to nitric acid, all the manipulations in the forge with various steels by welding and twisting them were needed precisely for this moment, to reveal the pattern.


In the photo (from left to right): thermal hardening, descaling, etching of the picture.
Actually the blade is almost ready, it remains to give only the sharpening angle, let's pay a little attention to the handle. We do the mounting of the handle in two versions with a shank and an all-metal mounting. With the all-metal version, I think no questions should arise, holes for rivets are drilled and overlays are attached to them. The all-metal construction is the most reliable type of fastening, but most prefer the more traditional shank fastening. For such material as birch bark celmet, installation is almost impossible.


In the photo (from left to right): shank firing, handle disassembled, handle before turning.
For installation, the shank is annealed, the metal is tempered for drilling holes, a stud is attached to the rivet - you can attach the guard and the handle. And the last step is shaping the handle - the knife is ready. It remains only to give it the required sharpening angle of the cutting edge, depending on the purpose.
I am attaching a number of photos that were not included in the main description, unfortunately, the originals were large, so all the photos in the article had to be compressed for normal loading on mobile devices and tablets, so I had to abandon the click-to-enlarge option.


Frequently asked questions about Damascus
To satisfy your curiosity, I will focus on a few of the most important points:
- Where does the pattern on the blade come from? - patterns on the surface of this type of Damascus are achieved due to the uneven distribution of carbon due to the heterogeneity of the material, which was specially enhanced by etching the surface with acids to give the blade a beautiful texture.
- What do you make your damascus out of? - blades are made from a package of four steels: ShKh-15 (structural carbon steel), KHVG (steel for measuring and cutting tools), U8A (tool carbon steel) and steel-3 (the name is conditional, but he will not want to reveal the secrets of his products to the end) no master).
- How many layers are in your blades - several thousand, which is achieved due to the fact that welded metal strips are forged three times. For the first time, 21-22 strips are welded, in the second and third times the number of strips is less, since the width of the workpiece directly affects the duration of the forging process.
P.S. I hope this material was useful and informative, maybe we missed something, you can send your comments to our mail, and in the near future we are planning to launch groups in social media. networks as soon as we find the administrator. Buy knives in our online store and we will make a lot of interesting text, photo and video material on knife topics.
It might be useful to read:
- World market of electronic document management systems;
- Conditions, factors and criteria for the successful implementation of the project;
- Why automate a business process;
- Closed corporate social network of your company Contact colleagues, work on documents, share your ideas, knowledge and success!;
- Business Intelligence (BI) systems for business analysis Some of the benefits of using BI solutions;
- Creating a new project in MS Project;
- Automated document management system;
- On approval of recommendations for maintaining a register of sellers and a register of agreements on the provision of a trading place in retail markets located in the Moscow region \u003d\u003d Form description \u003d\u003d;