We make a birdhouse for birds. Do-it-yourself birdhouse made of wood: drawings, dimensions, materials, decor and installation What can a birdhouse be made of
Birdhouses are an invention of civilization. Until recently, birds, even without a person, found shelter for themselves, in which they can lay eggs, hatch them and hatch chicks. But the situation has changed: there are practically no hollow trees, especially in the city. It became difficult for birds to find nesting places and people figured out how to help them. They invented analogues of natural nesting - these are birdhouses, titmouses and houses for other birds that you can make with your own hands.
How to make a birdhouse with your own hands at home
Birdhouses are the most popular indoor bird nests. Starlings need this house not for living, but for breeding. Therefore, it has a number of specific requirements.
Requirements for the right craft for birds
- Safe for birds;
- Convenient for laying eggs and hatching chicks;
- Warm enough but with good ventilation;
- With a tray of the appropriate size.
Materials for manufacturing
What are bird houses made of at home? Nature came up with the best material - it is a tree familiar to birds. Practical houses should not be made of chipboard, fiberboard, drywall, soft cardboard and other unsuitable materials. Wooden structures can stand for a long time, while paper, lining and cardboard quickly collapse under adverse weather conditions.
Boards are better to take hardwood. Coniferous - not the most suitable material. They secrete resin and make the bird's habitat sticky and dangerous to the birds. Resin can stick together the plumage of birds, and this is fraught with diseases and even death of birds. But you can hang a birdhouse on any tree in your country garden or in the yard. Here the birds do not care where to live, the main thing is to be warm and protected. 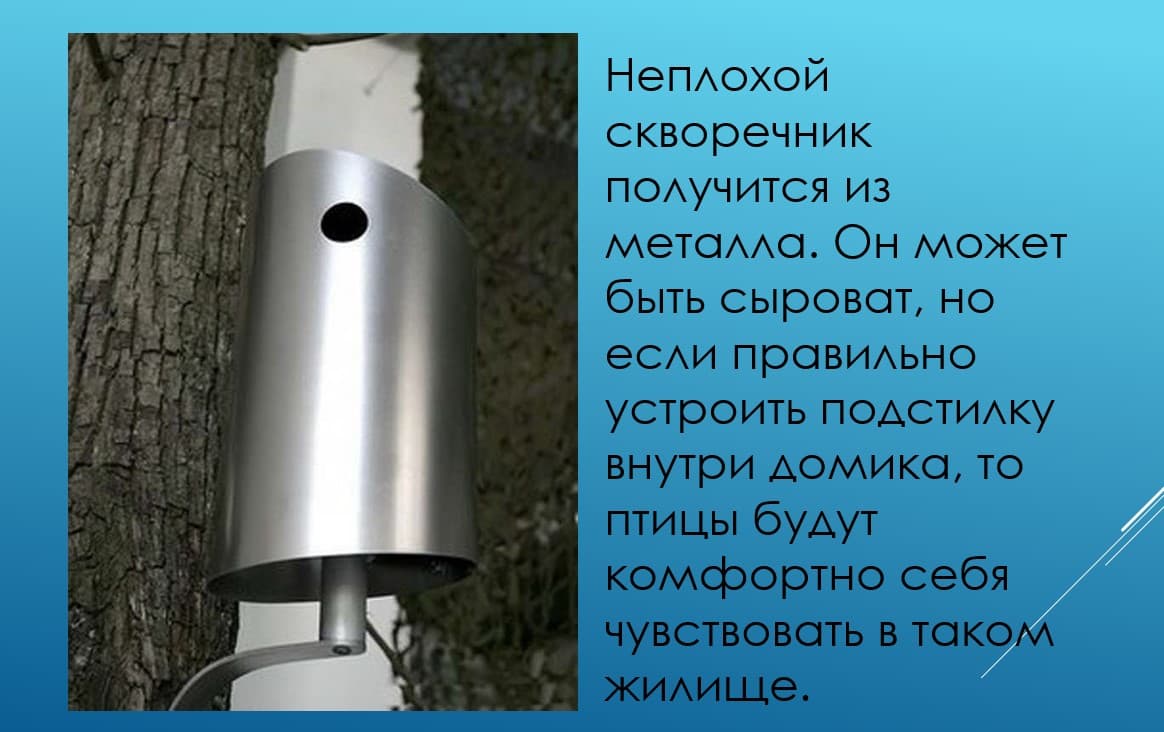
For decorative birdhouses, which are installed in places protected from wind and rain, boxes, bottles, cardboard and other materials are used.
Designs, shapes and diagrams of the device
All birdhouses can be divided according to the schemes into two groups:
- Houses of various forms;
- Duplyanki.
A traditional birdhouse is a rectangular box with a flat, single-pitched or gable roof and a round hole-notch. The size of the notch depends on who will live in the house.
Dimensions
- Height: 30–40 cm;
- Bottom length and width: 14–16 cm;
- Notch diameter: 5 cm.
If these dimensions are reduced, and a notch 3–3.5 cm in diameter is made, then a titmouse will turn out. Birds will settle in it, which daily eat insect pests and various larvae several times more than their own weight.
How to make according to drawings
It is necessary to build a house, as it should be, otherwise it will simply fall apart from the first gusts of wind. It is important to respect the dimensions. In a house that is too small, the birds will be crowded, in a large house it will be cold. Often a perch is made in front of the entrance - a perch. Birds rarely use them.
It is especially important to observe the correct size of the notch (inlet). It should be such that a bird can freely pass there, but predators - cats and crows - cannot get into it.
You can make a birdhouse in the form of a hollow. To do this, use a part of the trunk of a deciduous tree and hollow out the core in it. From above and below, the hollow is closed and a notch is made in the side wall. Such a house will remind the birds of a natural hollow.
How to make from wood
Boards made of alder, birch and aspen are suitable for nesting. The inside of the house should be rough. Smooth boards need to be processed with a chisel - apply horizontal notches. Chicks will be able to cling to these ledges and easily get out of the house.
In addition to the boards you will need:
- Nails;
- Joiner's glue;
- Ruler and pencil;
- Wood saw, jigsaw;
- Chisel or drill;
- A hammer.
- Water-based paint and decorative elements.
Sometimes the houses are painted. Do not decorate them with bright colors, this can scare away birds.
Birdhouse made of plywood and lining on a branch
This is the simplest bird house design. The tools are no different from those used in working on a wooden birdhouse. Depending on which roof you have chosen for the birdhouse (single or gable), you will need 6 or 7 parts. So, we are building a plywood house.
Manufacturing steps:
- Drawing. You need to determine the dimensions, make a sketch, clarify the placement of the walls, lid, bottom and fasteners and start creating a drawing.
- Cutting and sawing. First you need markup. All parts are transferred to plywood in such a way that the bottom overlaps the cuts of the walls, and the upper part acts as a visor. They cut plywood, adjusted for the width of the jigsaw and the gap.
- Assembly of parts. All cuts must be sanded. You can connect the parts with glue and self-tapping screws. It is necessary to glue the side walls and the front facade. After the glue has completely dried, the structure is strengthened with nails or self-tapping screws. The back wall is nailed last.
- Bottom and Roof. The bottom is screwed around the entire perimeter with self-tapping screws. The roof is better to make removable. This makes it easier to take care of the birdhouse. Once a year, you will need a general cleaning of the birdhouse from old nests, so the roof is fixed with only two screws. It should protrude 3-4 cm, forming a visor in front of the notch.
- Birdhouse ready. It can be painted and decorated to your liking.

How to build a cardboard
Cardboard is not the most durable material, but birdhouses made of it also have the right to life. Cardboard is better to take dense. Binding cardboard works well. It holds its shape well and is easy to color and process. Choose non-toxic ingredients, because birds will raise their offspring in this house!
Cardboard birdhouses will not be durable, but if done correctly, they will survive the season.
To make such a bird house, you need to follow the following steps:
- Sketch development. You need to make sketches and refine the dimensions.
- Drawing and cutting. Depending on the chosen design, a drawing is developed. All dimensions are transferred to cardboard and cut out with a clerical knife or jigsaw.
- Connection of parts. Assembly is carried out using wood glue. Its order is no different from the previous model.
- Finishing processing. Even the best cardboard is afraid of moisture. Therefore, such birdhouses must be treated with special means. It can be protective varnishes and paints.
Out of the box (made of cardboard and paper)
Cardboard boxes can make life a lot easier for bird lovers. Birdhouses are made quickly and do not require special tools. 
Manufacturing steps:
- Decide where in the birdhouse there will be a notch, and make a markup.
- Cut a hole at the marked location. Treat the cuts with moisture protection.
- Attach the roof. All parts can be connected with glue or tape.
- Coat the birdhouse with varnish or paint. Beautiful painting colors your design. You can come up with interesting decor details.
bottle houses
Our industry offers such a variety of beverage containers that it's hard to resist reusing them. Plastic bottles are an interesting material not only for children's crafts, but also for such a useful thing as a birdhouse.
Manufacturing steps:
- Training. Suitable plastic bottles with a volume of at least 1.5 liters. They must be clean and free of foreign odors.
- Make a mark on the bottle. Mark the location of the notch. Cut out the hole with scissors or a knife.
- Treat the sharp edge of the cut with tape or plaster.
- Insulate and decorate the house with burlap, twine winding or thick yarn tying.
- If desired, you can paint the house with acrylic paint. This will give rigidity to the structure and give it a finished look.
Unusual and original birdhouses from improvised materials
What kind of birdhouses you will not see today. Designers are developing entire collections of these unusual houses from improvised materials. Fans are not far behind. In the gardens you can see bird houses of the most intricate shapes and designs. For this, traditional and modern technologies are used. 
The most popular types of original birdhouses are:
- Wicker wicker houses. Birds like these birdhouses. They are made from environmentally friendly materials. Fans of weaving from paper tubes can also use their skills to build a bird house.
- Cork houses. For this, wine corks are used. The material is durable, tolerates precipitation well. The only negative is the complexity of the assembly. Therefore, it is used in combination with wood or plywood.
- Barrel-birdhouse. Small barrels in their shape resemble hollows and are perfect for a bird's home.
- Shoe houses. You will need a large boot, which is hung on a tree at the right height.
- Birdhouse made of branches. For such a house, the branches are connected with self-tapping screws or twisted with a rope.
- Pumpkin bird house. To do this, use a special utensil gourd lagenaria. They just make a hole in it for a notch.
Decorative and beautiful for the garden
Birds do not need painting. They may well get by with the simplest birdhouse. But for a person, a birdhouse is a space for creativity. Here are some interesting decor ideas.
How to decorate a birdhouse? Acrylic paints are used for painting. The birdhouse must first be treated with a primer. 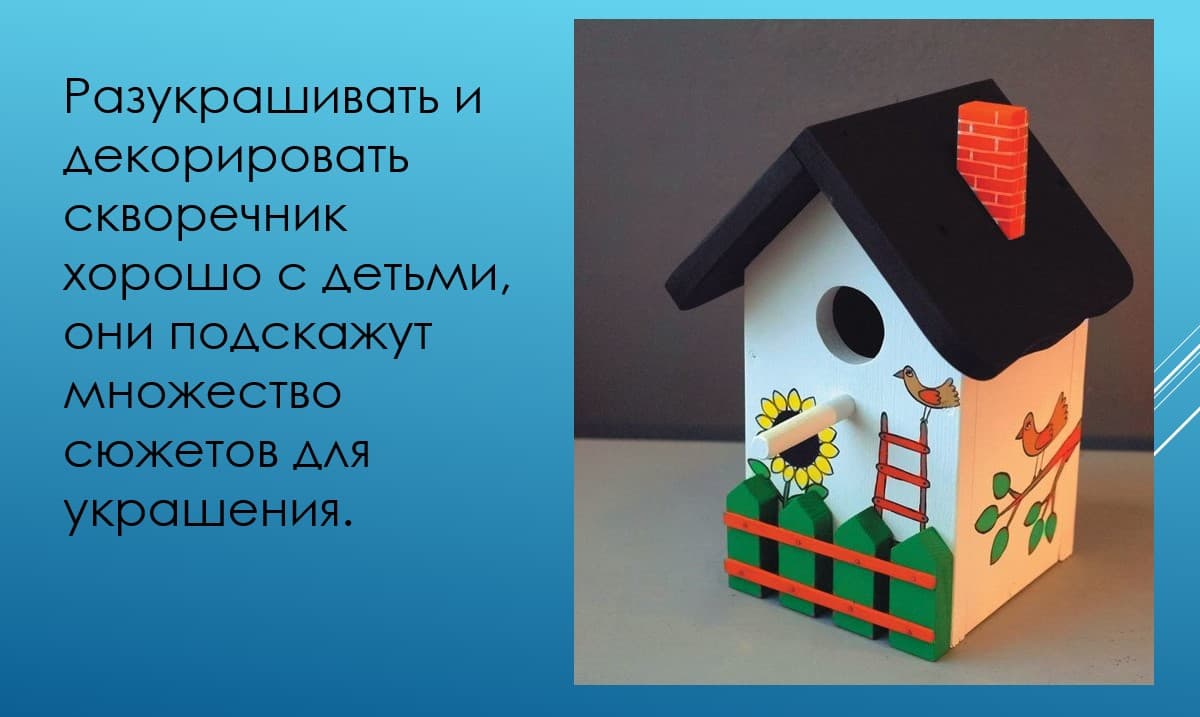
You can make a whole series of "Seasons" and display changes in nature on the walls of the bird house. For those who do not know how to draw, applications and decoupage are suitable. Just do not forget this beauty is covered with sweat varnish.
New Year's birdhouses
Such houses decorate the gardens during the January holidays. Birds do not nest at this time. But the birdhouse can be used as a feeder. And in the spring this design will turn into a real nest. You can decorate New Year's birdhouses with branches of needles, berries and other materials, but only natural ones!
How to hang a house?
You need to attach a bar to the back of the house, with the help of bark it will be hung on a tree. It is advisable to hang it vertically evenly or tilted forward. If wire is used for this, then it should be at least 2 mm thick, it is better to take stainless steel. You can hang birdhouses at any time of the year, but it is better when the birds return - in the spring.
Video
On the video, different options for bird houses:
Outcome
Birdhouses installed in the garden attract different birds. Do not be discouraged if they do not immediately settle in your house. Sometimes this takes time. Use a simple birdhouse base and use all your imagination when creating decor. Your efforts will be appreciated not only by winged friends, but also by neighbors, and even more so by a garden that will thank you with a good harvest.
You can take care of the birds by throwing them bread crumbs or seeds. Pigeons and sparrows flock to such a treat with pleasure. What else can we do for birds? In the city and in your country house? Of course, to build them a house for housing - a birdhouse. Why do people build birdhouses? In fact, they also build titmouses. They are similar to birdhouses, only smaller in size and have a slightly different architecture. But why do we still call bird houses birdhouses and do not use other names? The fact is that not all birds will agree to settle in a “house” built by strange creatures on two legs. It is clear that this does not apply to the impudent sparrows. And the starlings settle down.
Starlings live as a friendly family without noisy sparrow fights. They are able to perfectly imitate the singing of other birds, including the famous nightingale trills. And no one better than starlings cleans our squares, parks, forests and garden plots from insects. Do you know how many May beetles can be eaten by one starling during the nesting period? 8 thousand beetles with larvae! And caterpillars, slugs, snails are absorbed by him simply without counting. Therefore, building and hanging birdhouses, a person cares not only about the birds. A man takes care of his future harvest. And you should be happy if a couple of starlings choose your house. This is great luck!
But it is not enough to build a birdhouse. You have to build it right and hang it right.
A few simple rules to be aware of
Here are a few rules to follow before you start building your starling house:
- The birdhouse must be checked, otherwise the birds will not be able to live there in the summer. For ventilation, a couple of small gaps between the roof and the walls of the house will be enough. For the same reason, making a birdhouse out of metal is a bad idea.
- It is necessary to organize "drainage" in it. Water that enters the house must immediately leave. To do this, drill very thin holes in the floor, and to protect the notch (inlet), install a small canopy over it.
- It is best to hang a new birdhouse in early April. And in the old one, through the removable roof, carry out at the same time a “general cleaning”. Birds will not return to the birdhouse if it has not been cleaned for almost a year.
- In rural areas, the optimal height for a birdhouse is about 4 meters. In the city it must be weighed higher. See that there are no branches nearby. So cats and other lovers of starling meat will have less chance.
- The birdhouse should be covered with foliage from direct sunlight.
- Your creation must be nailed strictly vertically, no Prague "dancing houses". The letok should look in the direction from which the wind blows least often.
- Very important! It should be remembered that it is not enough to nail a birdhouse. It must be cleaned every spring before the arrival of new guests.
Classic wooden birdhouse
The best material for making such a house is wood. However, not every tree will do. A board made of birch, oak and alder is well suited. Coniferous trees are not suitable because of the resin they release. Do not use chipboard and fiberboard for the construction of birdhouses - the chemical components used in their manufacture are harmful to birds. Plywood would not be the best option.
There is a birdhouse standard. The board must be used with a thickness of at least 20 mm, so the house will better retain heat. Do not use a sanded board - this will make it difficult for the chicks to leave the birdhouse. If the board is polished, it is necessary to scratch with a knife or nail that side of it, which will be inside. Usually birdhouses are made with a width of 120 to 150 mm, a height of 300-350 mm, a side wall length of 150-160 mm. It is important to observe two more dimensions: the diameter of the notch (inlet) should be 40-50 mm, the distance from the notch to the bottom of the house should be at least 150 mm.
A larger birdhouse will accommodate more pets, but natural selection will oppose your plan in this matter. Parents will not be able to feed all the hatched chicks, and even those who survive will not survive the flight to wintering in warmer climes - they will grow up weak. Entrust this question to Nature and try to stick to standard sizes when building a birdhouse. In this case, out of all the offspring, a couple of chicks will survive, but strong and strong.
The indicated dimensions are well suited for the dwelling of starlings. Sparrows will happily settle in. And for great tits, the diameter of the notch will have to be reduced to 35-40 mm, for small tits, an inlet with a diameter of 30 mm will be enough.
Of course, changes can be made to the design of the birdhouse and imagination can be shown, but then the given dimensions should be adjusted. Compliance with the basic dimensions is very desirable; the very life of the bird family may depend on them.
Below are a few drawings of the simplest birdhouses:


Prepare in advance a ruler with a pencil, a hacksaw for wood, a screwdriver, a hammer, self-tapping screws and a drill. We cut the boards to the dimensions in the selected drawing and proceed to assemble the birdhouse (in this photo, the birdhouse has a rectangular entrance).

To fasten the elements of our design, we pre-drill holes for self-tapping screws with a thin drill.


We fasten the walls together with self-tapping screws. Nails can also be used in the work, but you must carefully watch so that one of them does not accidentally come out. We remember what miniature guests should settle in our house.


The perch below the entrance can be made from a planed stick and then inserted tightly into the prepared hole. The perch may have the shape of a triangular shelf. A perch is especially needed when the house is attached to a pole. After all, the head of the family must sit somewhere with food for the younger generation in his beak. She is needed, and to sing songs at the entrance to your house. The perch is made with a diameter of 10 mm and a length of 40 mm.

Letok make a round or rectangular shape. Remember that its diameter should be 50 mm. We drill a notch with a drill or cut it out with a jigsaw.

Unlike the inner walls, the edges of the notch are carefully sanded. There are cases when starlings expressed dissatisfaction with the poor quality work of the owners of the site and demanded that the defects be eliminated. First of all, this concerned the size of the notch and its raw edges. It's not a joke.


The letok should be located so that the cats could not reach the chicks from the roof of the birdhouse (see dimensions).


Important! A fixed roof is inconvenient for the annual cleaning of the birdhouse. And this must be done every spring before the birds arrive, otherwise you will end up with a “disposable” birdhouse. Turning the roof into a removable one is quite simple. From below, a sleeve is attached to it, corresponding in size to the bottom of the house. The sleeve should fit snugly against the walls and enter the hole that they form with some effort, then the lid will hold well. For reliability, you can screw the lid to the house with wire. In this case, the wind will not blow it away, and the cat will not be able to remove it. And cats and crows will show increased attention to your birdhouse. The roof is easier to make a shed. It definitely will not leak (unlike a gable). Make a roof with a slight slope back.

The last stage of our work is fixing the finished house to the tree. It is convenient to attach a long bar to the back wall of the birdhouse with screws in advance and then nail or screw this bar to the tree with screws. For reliability, we also fasten the house with wire. The height is about 4 meters, in the shade, without direct sunlight, there should be no branches nearby.
The finished birdhouse can be pre-decorated from the outside. Contrary to popular belief, a painted bird house will not scare away, but it will decorate your site. However, be prepared that starlings will not immediately move into a new home, some time will definitely pass. And it may take more than one month.


Birdhouses from unusual materials
A birdhouse can be made not only from boards, but also from completely unexpected materials.
Birdhouse made of cardboard
Cardboard in our view is poorly associated with building material for the construction of a dwelling. However, as experience shows, cardboard can easily cope with the task of urgent construction of a birdhouse with a service life of at least one season. Only it is necessary to use not the usual and familiar cardboard (it will quickly get wet under the influence of atmospheric precipitation), but dense corrugated cardboard.

In addition to corrugated cardboard, we need paper with a self-adhesive coating, rope, pencil and starch. And, of course, a tool: scissors, ruler, square, knife and compass.
We will need to cut out all the elements for assembling the house (roof, walls, bottom) from corrugated cardboard, only in double quantity. Starch is needed to make a paste. The paste has a natural smell and, unlike synthetic glue, it will not scare away the birds and inspire them with the idea that they have chosen unfavorable housing from an environmental point of view.

Each pair of parts is glued together with a paste, due to this they acquire increased strength. The only problem will be the lack of ventilation in the house. Cut a hole for the notch in the front wall. We can make a perch in such a design, only it will not hold very firmly. In the back wall we need four holes through which we will pass the rope. Rope or twine can be replaced with wire. We need them in order to tie our house to a tree.
We glue the walls end-to-end, observing a right angle.

We should get such a box:

While the paste is not dry, we wrap the box with threads. So it doesn't get out of shape. After the paste dries, we will no longer need threads.
We glue the roof of the house in two parts. The design will be somewhat reminiscent of the roof of a wooden house with a sleeve that we nailed to make the roof removable. When making a house from corrugated cardboard, the smaller part of the roof should be inside the structure, and the larger part with allowances on all sides forms a kind of overhang that will protect the house.
We glue the house with laminated paper. It will add density to the whole structure and at the same time will serve as a decorative element.

And what, a good house turned out?

house out of the box
An unexpected (albeit temporary) solution would be an empty juice or milk container. The use of ready-made containers will allow us to solve the problems that suddenly fell on our heads even faster. Or rather, a problem that has arrived.
We quickly empty the container from the contents, wash and dry. While the container dries after washing, we prepare the wire, scissors and an awl. An ordinary notch is cut out in the front wall. We pierce holes for the wire in the upper part of the box - our makeshift house will hang on it. The bottom must be reinforced with cardboard or corrugated cardboard, which we attach to the bottom of the container.
It remains to decorate our house with laminated paper or craft paper with a protective layer. We hang the house in a suitable place, wait for the melodious guests and tell the neighbors that this is the most fashionable house design that you personally found in the Belgian birdhouse community.
Housing with panoramic windows from a bottle
We are used to empty plastic bottles being used as bird feeders. A hole is cut in the bottom of the bottle, into which food is poured, and the bottle is hung up. By the same principle, you can make a bird house from a plastic bottle. In this case, the notch hole is cut out where it should be - in the upper part of such an unusual building material. In the lid we make a couple of holes for the wire, with which the house will be hung on a tree. To prevent the life of the starling family from being like the show "Behind the Glass", the bottle can be pasted over with beautiful paper or a decorative pattern applied. Although the starlings themselves, judging by the observations, treat the “transparent” walls of their dwelling quite calmly.

As you can see, building housing for starlings is a simple matter. At the same time it is very exciting. And also useful for raising their own offspring. Join now! Just not like in a stupid ad about sausage. After all, this is really a good deed - to make birdhouses with your own hands.


Birds are indispensable helpers in the fight against harmful insects. But in order to "negotiate" with the birds on the provision of all possible assistance, you need to attract them to your site. And for this we will comprehend the basics of building a birdhouse. By the way, the ability to build such bird houses is also useful for introducing the child to taking care of the world around him. So, if the age and development of the motor skills of the baby's hands allow - take him as an apprentice. In the article you will find different ideas for making bird houses out of wood.
What you can do: birdhouse, titmouse and other houses
Much is known about the benefits of birds on the farm, but some figures are still impressive: during the season, a small starling destroys up to a thousand larvae of the Maybug. This allows you to keep the root crops safe and sound.
If your main goal is to attract birds to the site, then, depending on the planned result, the birds must be of a specific species. But even if the birdhouse is built simply as a feeder, you must consider that not only starlings populate hanging apartments. So first you should familiarize yourself with the types of these dwellings, and at the same time with some engineering features of their construction.
Dimensions for drawings of wooden houses for different birds
The shape, size and some other nuances will depend on which birds you are building a house for.
- nesting. A house with a vertical wall at the back, a long roof slope that joins this wall at an angle of 30-40 degrees, and triangular sidewalls, as well as through entrances. Such structures are built no higher than 1–1.5 m from the ground and are intended for pikas.
- Wagtail. This house should be located horizontally at a height of 3-5 m from the ground, since the birds do not fit in a classic birdhouse, the bottom of which varies between 14-16 cm, and the walls - from 20 to 30 cm.
- Sinichnik. This is a habitat for small birds. Height 30 cm, dimensions 10 x 10 cm, notch 3–4 cm.
- duplyanka. A kind of "tourist" house for different birds 2 m from the ground, which can be made of logs with two plugs on top, bottom and an inlet in the middle. Outer deck diameter - from 15 cm
- Poluduplyanka. Built for flycatchers. It looks like a smaller copy of a birdhouse - 12 x 12 cm and 15 cm high. This house must be equipped with a wide rectangular notch and a sloping roof overhanging it.
- birdhouse. It has a square bottom 14 x 14 cm and sides in the shape of a rectangular trapezoid. Moreover, the back board should be higher than the front one so that the roof rests on them at an angle. It may also have a gable roof.
Photo gallery: types of wooden houses for different birds
Gable birdhouse  Single-pitched birdhouse
  Sinichnik
  House for small birds
  Owl nest
  Nest for small birds
  duplyanka
Materials and tools
To make a classic birdhouse you need:
- boards, preferably pine, or a log of suitable width;
- self-tapping screws, nails of different sizes;
- acrylic weather-resistant paints - if you will paint the product;
- putty for wood processing - if necessary, seal cracks.
As for the tools, you need:
- hand saw or jigsaw;
- drill with a cutter for cutting a notch;
- screwdriver;
- screwdriver;
- a hammer;
- pencil, ruler, protractor, compass.
Safety
When designing a birdhouse, you will have to deal with piercing and cutting objects. So without observing the safety rules can not do.
We list the main ones:
- Taking on the solution of the housing problem for birds, you need to be focused, attentive and not be distracted by extraneous matters.
- Work should be at a comfortable and sturdy table so that all tools and materials can be placed on it.
- If you decide to trim the tree before marking, then do it with glasses so that the sawdust does not get into your eyes, and with gloves so that you do not have to remove splinters.
- After assembly, make sure that there are no notches left in the birdhouse, otherwise the feathered guests may be injured. For the same purpose, it is necessary to bend or grind off the protruding ends of nails or screws with a file.
Birdhouses with a step-by-step description of manufacturing
Consider options for bird houses from traditional to original.
The first attempts to build houses for birds were made in the last millennium by the Indians. Gradually, this innovation moved to Europe, from where it came to Russia through the efforts of Peter I, who appreciated all sorts of funny little things.
Classic birdhouse with a gable roof
Materials and tools:
- 2 rectangular parts for sidewalls 15 cm wide and 22 cm high;
- 3 parts 19X37 cm for the front and rear walls;
- 2 parts 15x15 cm as a floor and one part of the roof;
- stick for sixth;
- detail for the roof 15x17 cm;
- nails, hammer;
- glue for fixing the pole;
- drill with a nozzle for cutting round holes 5 cm in diameter;
- ruler, pencil.
Instruction:
- We draw all the details on the board and cut them out.
- Don't forget to cut an inlet in the middle of the front wall with a diameter of 5 cm at a distance of 19.5 cm from the bottom.
- On the front and back parts we make a 15 cm bevel under the roof with an angle of 90 degrees.
- We connect the facade and walls.
If necessary, we bend the protruding parts of the nails so that they are tightly pressed against the walls and, for sealing, we process the joints with hot wax or a special putty for wood.
- We fasten parts of the roof to the back wall and facade, joining them well with each other (it is worth puttingtying the seam). Only so that the roof can be raised and the birdhouse cleaned. To do this, it is better to use self-tapping screws that can be unscrewed and then screwed back in.
- Once again, we check if there are any protruding nails or self-tapping screws inside the birdhouse. We fix the bottom.
- We glue the six.
Attention! The same model can be made with an easily removable bottom. To do this, we fasten it not on screws, but on long wooden "studs". By the way, the rest of the parts can be mounted on carpentry glue.
Birdhouse made of rectangular parts
A simplified variation of the classic birdhouse, which a schoolboy can make on his own, assumes that all the details of the house are cut in the form of rectangles.
Instruction:
- Cutting out the details. Please note that all vertical parts are the same, and the bottom is equal in length to the width of one vertical part + two board thicknesses, and in length is equal to the width of the facade. The roof has the shape of a square with sides equal to the length of the bottom.
- In the front part we cut out a notch with a diameter of 5 cm and a small hole for the hearth.
- We connect the vertical parts with nails or self-tapping screws.
- We attach the bottom and roof. We glue the stick-six.
- We nail the birdhouse to a long narrow board, for which we will fasten it to a tree.
Video: a boy makes a birdhouse with a flat roof with his own hands
The original version without a diagram - a bird house from a deck
Materials and tools:
- a deck of a suitable size;
- chainsaw;
- drill for sampling wood.
Instruction:

Video: log birdhouse - folk way
Light house made of wood and a tube
Materials and tools:
- tube;
- a small board with a width not less than the diameter of the tube, a length of at least two diameters;
- jigsaw;
- pencil, compass;
- drill and screws or hammer and nails, long and short.
Instruction:
- Cut off about ¼ of the tube.
- Measure the inside diameter of the hole.
- We make 2 circles of this diameter from the board.
- We fix the first circle on the tree with screws or nails.
- In the second, we cut out a round hole-notch.
- We drill a hole for the pole in it just below, insert the pole.
- We place the facade in a tube. With small nails we nail it around the circumference, slightly “drown” in depth so that the house has a canopy.
- We put the workpiece on the second circle fixed on the tree and also nail it with carnations.
If you do not want to damage the tree, then you can try not to cut the back wall out of the board, but simply leave the bottom of the tube and then, threading a belt tape or wire into its hole for the handle, fasten it to the trunk.
Photo gallery: bird houses made of other materials
 Birdhouses from plastic bottles can be painted with acrylic paints so that the house is not transparent, but even then there is no guarantee that birds will settle there
  Birdhouses can be made from the most unusual things, for example, from a propane tank
  Birdhouse boots can be decorated with a bright pattern
  This model can only be a feeder, birds will not feel comfortable in a transparent house
  The disadvantages of cardboard "apartments" are their extreme impracticality, as well as low weight, which creates problems in rainy or windy weather.
Every gardener knows that birds are not only living "decorations" of our garden, delighting us with their sonorous trills from spring to autumn. These cute feathered creatures help us all summer, protecting plantings from insect pests and even small rodents. To lure the birds to you, you need to provide them with a place to live. Therefore, it is worth training our skillful hands and learning how to make birdhouses from wood.
What you need to know before taking on a job
It is good if you already have experience in carpentry and carpentry. In this case, the manufacture of such a simple structure as a birdhouse will not be difficult for you. But even if you are completely new to this business, it's okay: we will tell you in detail how to make models of varying complexity. In any case, for work you will need the following tools:
- ruler;
- a simple pencil with a soft lead;
- hacksaw;
- nails or screws;
- hammer or drill (screwdriver);
- a drill of the required diameter to make holes;
- screwdriver;
- steel wire with a diameter of 1 mm;
- tow or clay;
- plane;
- sandpaper;
- glue;
- if necessary or at will - drying oil.
All these tools and materials should be at your fingertips during work, regardless of the level of complexity of the birdhouse being made.
Separately, it is worth talking about the wood from which you will build a birdhouse. We strongly recommend not to use:
- coniferous tree (pine boards, etc.);
- plywood and any other similar glued compressed material.
Softwood boards, even after careful processing, continue to release resin. From this, the walls of the birdhouse will be sticky, which is very harmful and even fatal for both adult birds and chicks. Fiberboard and chipboard are known for releasing toxins during operation that will not benefit birds. Plywood, which seems to be the most convenient and inexpensive material, is also not suitable: it does not transmit sounds well, which is very important for safety.
Plywood does not retain heat well, which is so necessary when nursing chicks.
The best wood for a birdhouse is deciduous, for example, birch, aspen, oak, linden.
The optimal thickness of the board should be 20 mm - this is enough to maintain a suitable temperature inside the structure.
Note! Birdhouse boards do not need to be sanded, they should be rough at least on the inside of the product. So it will be much easier for the birds to get out of the dwelling, clinging to the bumps with their claws. It would be useful to make a few notches on the board with a chisel.
Now let's talk about the size of the future birdhouse. Ornithologists argue that the design should be compact in order to accommodate, in addition to adults, only 3-4 chicks. In this case, all the offspring will have enough warmth, attention and food to grow up healthy and strong. Otherwise, all chicks from the brood will be weak, sickly and incapable of long-distance flights.
The standard, optimal dimensions of a birdhouse (house for small birds) are as follows:
- height - 30 cm;
- bottom width - 13–15 cm;
- notch diameter - from 3.5 to 5 cm.
Important! Birds are different, and they need different houses. The point here is in the form, and in size, and in the design itself. There are many varieties of man-made bird houses, for example, there are titmouses, sheepskin coats, nesting places, triangular (wedge-shaped) dwellings. Therefore, if you know what tenants are on your site, do not be lazy and do exactly what they need.
So, the tools and materials are prepared, it's time to get down to business.
Video: what to consider when making a birdhouse
Safety
Working with wood requires adherence to safety rules. When making even the simplest birdhouse, you can injure yourself with a tool, drive a splinter into your finger. To prevent this from happening, remember the simple rules for joinery and carpentry:
Instructions for making wooden birdhouses with drawings and photos
Making bird houses can be quite an entertaining activity. It would seem that an ordinary birdhouse of a simple form, what could be unusual in it? It turns out that bird houses can be made in several ways from various materials.
The simplest option with a shed roof
Perhaps, after repair or construction, you still have rectangular trimmings of suitable boards. They are ideal for building a birdhouse, and you do not have to look for materials.
We suggest you use a simple birdhouse drawing.
- Take the prepared boards and mark all the elements with a pencil: bottom, lid, walls, according to their size in the drawing. In our case, the bottom is a square with sides of 13 cm; the back wall of the product is 4 cm lower than the front to provide a slope for the roof to drain rainwater; cuts are provided along the top of the side walls for slope.
Attention! For a removable roof, 2 parts are required: one is the same size as the bottom, the second is larger for a canopy.
- Saw off each element in sequence so that all paired parts have the same dimensions. At this stage, you can plan the outer surfaces of the boards with a planer.
- Make a round entrance hole in the front wall. You can make it rectangular, but the shape of a circle is preferable.
The hole should be at least 5 cm from the top edge; this distance will protect the chicks from the encroachment of cats.
- Now you need to assemble the birdhouse. Fasten the facade and side walls with wood glue, and while it dries, fix the parts with nails or self-tapping screws. Next, in the same way, connect the bottom to the side and front walls. The back wall is glued and fixed last.
Try to make sure that there are no gaps.
By fixing the rubber layers on the ends or attaching the roof to the hinges, you can protect the birds from the intrusion of cats as much as possible.
A simple, but at the same time convenient and reliable birdhouse is ready. It remains only to fix it in the chosen place. But we will talk about this separately: there are a lot of options for installing and fixing birdhouses.
Video tutorial on making a simple birdhouse with a flat roof
Birdhouse with gable roof
Now, following the same principle as in the previous paragraph, we will make the birdhouse a little more complicated. Its gable roof not only looks prettier, but also keeps rainwater and snow out more effectively.
The drawing below shows all dimensions of the parts.

If desired, you can paint the birdhouse with drying oil. This will help protect the wood from mold and insect pests. Coloring with non-toxic water-based compounds is also allowed.
A log house that can be made without a scheme - a hollow
Not only from flat boards you can build a birdhouse. There is such a Russian folk version of the bird house, which is hollowed out from a cut of a log and is called a hollow. When harvesting firewood, you may well saw off a piece of a round log of a suitable diameter, from which a good birdhouse will turn out.

Video tutorial: do-it-yourself original birdhouse made of logs
A bit of design: decorating the house with wine corks
It turns out that corks are suitable not only for closing wine bottles with them or for decorating them. They are great for decorating the walls of a birdhouse. The advantages of the material are undeniable:

So, you will need:
- corks from wine in the right amount;
- prepared frame for a birdhouse;
- sharp knife;
- hot glue gun;
- wooden rods.
It is not recommended to use a screwdriver when working with such material. The sharp ends of the screws can protrude beyond the cork and injure birds. Therefore, we will use hot glue.
Progress:
- First of all, you need to make walls. Apply glue to whole corks or cut edges of corks cut in half and stick them. For 1 row, depending on the width of the wall, you will need 2-3 plugs.
- Place corks on glue to the walls of the birdhouse up to its very roof. Where the frame structure narrows, use corks cut in two or even smaller. On the facade of the birdhouse, where the notch is located, lay out the central row vertically.
- To decorate the roof, cut round corks up to 5 mm thick from corks, and lay them like tiles.
- It remains only to decorate the sides of the roof and the joints of its wings with moss, twigs or pieces of cork. Wait for the glue to dry completely and hang the birdhouse in the garden.
Photo gallery: how else can you arrange the finished product
 Smiling birdhouse greets future residents
  Let your kids decorate birdhouses using decoupage technique
  You can arrange a birdhouse for a real house, with a window, a door and a fence
  You can decorate the birdhouse with Khokhloma painting
  You can fold a birdhouse hut from small blocks of wood, as they say, without a single nail
  A simple birdhouse, the frame of which is glued with corks, looks like a beehive from a distance
  Painting with waterproof acrylic paints is a real art
  Such is the brand letok
  You can completely paint the birdhouse from all sides
  Roof tiles can also be made of thin boards
  Angry bird house
  European design your child can handle
  Simple painting is one of the win-win options if it is done with high quality and accuracy.
The nuances of fixing a birdhouse
In fixing the bird house, it is important to follow two rules.
Birds are orderlies not only of the forest, but also of the garden. Every summer resident knows this, in which fruit trees and shrubs grow on the site. All year round, birds not only delight the ear with their singing, but also help gardeners in their hard work of protecting trees from pests, destroying small insects and feasting on their larvae. To attract birds, they hang feeders on trees and feed voluntary helpers in the cold winter season, when finding “prey” is not so easy, and they also arrange a home for them. A solid wooden house will appeal to any bird, in which she can not only live and hide from the weather, but also breed.
Nuances that are important to know before you get started

As it is already clear, the best birdhouse is made of natural materials, in the sense of wood. Some craftsmen make houses from cardboard boxes or plastic bottles, however, this is not at all the same. In the first case, the dwelling will be temporary and will last one season if it does not get wet earlier in the rain. Plastic containers are more suitable for manufacturing, besides, there is no question of their naturalness. It will scare away birds and the smell of chipboard or plywood, the latter is also too thin and the house will be cold.
For a bird house, it is worth using hardwood boards, but in no case coniferous - they contain resin that will stick to the plumage, which is fraught with the health of birds. The thickness of the boards should be at least 20 mm so that they retain the heat needed by the chicks.
Planing boards, achieving their perfect smoothness, is not necessary. A rough surface, especially inside the birdhouse and under the entrance, will help the birds get inside and move around without difficulty.
We make a birdhouse step by step

First of all, you should draw up drawings of the future home. This will facilitate the process of manufacturing blanks and make them even, so that in the future there are no gaps between the walls.
Birdhouses can be of different sizes and shapes - it all depends on which birds will live in it. Too spacious "apartments" do not need to be made, because the bird family is small and the young can freeze or grow weak. The standard dimensions of the house are approximately as follows:
- bottom width - 15 cm;
- birdhouse height - up to 30 cm;
- roof - approximately 20x24 cm;
- the diameter of the protrusion (notch) - no more than 5 cm.
It is better that the back wall is a couple of centimeters lower than the front panel - such a slope is necessary for water to drain. Accordingly, then on the side walls the upper cut will go obliquely. The roof should protrude a little, so its dimensions are somewhat larger than the bottom.
 Now you can get to work:
- Transfer the drawing with a pencil to the boards.
- Cut out all the details.
- Trim the outer surface of the blanks.
- In the front panel, cut out the “entrance” in the form of a circle.
- Assemble the birdhouse in the following order: facade, side walls, bottom, back wall, roof, notch. All parts must fit snugly together. It is better to fix them on self-tapping screws or nails.
It remains to attach a fastener in the form of a bar on the back wall to the birdhouse and install it on a tree, wrapping it well with wire. Do not paint - the smell of paint will scare away the birds.
It might be useful to read:
- Kuibyshev Aviation Plant;
- Aviation of Russia Perspective complex of long-range aviation pack;
- Now "Made by us" and in Telegram Il 112v last;
- Employee reviews about Salut;
- NPTs gas turbine building "Salute;
- Cessna 172 cockpit interior;
- Improvements according to the comments of the military;
- OAO tank named after Mr. Beriev. Russian aviation. Association and activities;