How to make a presentation on a computer. How to make a presentation: step by step instructions. Adding and decorating pictures
Today we will tell you how to make a presentation on a laptop, as well as describe the main problems encountered during this process. In addition to all this, we will reveal a couple of secrets that will help you create a presentation on a laptop.
Before we start, let's understand what is a presentation? To be brief, this is a brief presentation of information, with the help of which the speaker reveals the main essence of the problem, issue. Today, the presentation is very often used by both businessmen and ordinary schoolchildren or students in the educational process.
Very often, the presentation includes various drawings, diagrams or very complex dependency graphs - this is done in order to better and more understandably present information to the listener.
In addition, there are many small details, which we will consider below.
- 1. Scan the material, and then copy it to a laptop using a USB flash drive. In the future, you can use special programs to recognize the scanned text.
- 2. Use electronic versions books. In this case, you do not need to use a scanner.
- 3. Do everything yourself, that is, type the text manually. This method is the most time-consuming, so it is best to use it if you are good at typing, or if the amount of text is not large.
Show all
Main components
If you decide to make a presentation on a laptop, then you will first need some software products, for example, Microsoft power point. If this product is on your laptop, then you can proceed to the next questions. The main problem that arises if you want to make a presentation is the availability of good material: beautiful pictures, high-quality text, the presence of sound, and much more. This will be discussed below.

The text part of the presentation
Ideally, for your presentation, you should write the text yourself - based on your personal experience. Firstly, such material will be really unique. Secondly, your experience can be very interesting for listeners. In the event that you do not have such skills, then you can go the other way.
You can use special reference books and books that contain information on a topic of interest to you. But here there is a problem with the transfer of information in digital form. Here you can do it in several ways:
It is worth noting that in addition to books, you can use other sources: abstracts, catalogs and much more. It is recommended to combine various materials to create a presentation on a laptop - so it will be much more informative.
In addition to all this, it is worth looking for information on various thematic sites - very often there will come across really good material.
Presentation visuals
An integral part of any good presentation that can be made on a laptop is the presence of graphs, various pictures or diagrams in it.
If your work is dominated by photographs of the city or any other place, then it is best that these be your own personal photographs taken by yourself. In the event that you do not have the opportunity to do this, you can use the search engine to find the images you need.
The same applies to the rest of the elements. For example, you can draw graphs or diagrams yourself using special software packages. If you do not want to use complex programs, then the way out is to use Excel - this package is ideal for our needs.
Video sequence
In the event that you decide to use video in your presentation, then you should definitely prepare for problems: find a good video camera, process video, and many other little things. However, if you have the opportunity to make and remove good video, then you should definitely use it.
Otherwise, you can use simple tricks. The simplest thing is to use as a camera - a camera from a mobile phone. You will lose some quality, but you can still easily shoot the same.
If you have gone this route, then it is better to shoot the thing close-up so that everything is legible.
Creating a presentation
So, you briefly got acquainted with all the elements that may be present in the presentation. Now it's time to put our knowledge into practice. As we said, for this we will use Power Point.
Where to begin?
Despite the fact that the presentation, in most cases, the creator perceives as a visual image, in fact, not a smaller part of it, and maybe even more important, is your performance. The success of the whole undertaking will depend on how correctly and clearly you formulate and express your thoughts. Therefore, try to preliminarily create some kind of speech plan, decide what you will say at the beginning and what at the end.
In addition, you should accurately and specifically highlight the specifics of your report, try not to mix the main topic with secondary ones - this can add confusion to your report. At the same time, consider the time that will be allocated to you for the report. Sometimes you may just simply not have time to tell everything, so try to put main idea in short presentation, the rest can be provided to those interested in the form of a printout.
One of the best tools to help make good presentation on a laptop, these are slides, especially when they visually correspond to the text of the report, they describe each step. You can create slides in Power Point, for this you need to press just one key.


If you do not like the slide or want to change it, the program has a function to delete slides or move them around the presentation structure.
Having created a slide, you can write a title, place text. Depending on which layout you choose, you can change the position of the text.

As you have already noted, all our slides are white. To change this, you should open the "design" tab and select the one you like.


With this simple action, you have changed the look of the entire presentation. So, we can place the text and it's time to talk about working with it.
Work with text
Processing and managing text in the Power Point software package is a very easy task that does not require any complicated actions from you. You click with the mouse in the right place and simply type or paste the text you need. If you do not like how it is located, then you can easily move it or change its location, rotate it. While writing the text, it is worth considering spelling - the program underlines all errors in red.


Working with graphs and charts
In order to insert the desired diagram into the presentation, the program has a special tab "insert" - "diagrams" for this.

After clicking, a window will open in which you can select the type of chart: pie, scatter or line.

When you decide on its type, you will be taken to a window very similar to the Excel window, into the cells of which you need to enter data, indicators, according to which a chart or graph will be built. A presentation that has beautiful and informative graphics will be taken more seriously.


There is also a separate tab for inserting tables:


In the window you can select the parameters for the future table.

Insert pictures, drawings and videos
Interesting images will no doubt improve the quality of your presentation. In order to insert the desired picture or drawing, you should select and click the appropriate tab, then select the picture (indicating the path to it):


The same goes for video files.

06/02/2017 14:19
In the line of special tools for creating presentations, PowerPoint stands out. Microsoft Program, which is part of the office suite, helps both experienced and inexperienced users create, view and deliver beautiful presentations. The extensive functionality of the software allows you to visualize your material with high quality and variety, present it to the audience in the form of a bright, spectacular and memorable show.
By mastering Microsoft's presentation and slideshow software, you'll learn the art of visualization. Any idea presented in such an accompaniment will be better absorbed by the listeners. With the help of a presentation, you can teach schoolchildren and students, demonstrate engineering and design projects, films, music videos and photographs, make presentations to an audience, and even arrange a theatrical performance. PowerPoint allows you to create a presentation of any complexity: from the usual (with pictures, tables, etc.) to the complex, replete with animation special effects. It all depends on the audience, the goal, your imagination and how successful you are in mastering the functionality of the program.
How to make a presentation in PowerPoint or ten steps towards the goal
Step 1. Come up with a concept.
First, the text part of the speech is worked out, and then it is already accompanied by visualization elements. The presentation cannot replace the report, it comes in addition: it helps to convey information to the listener, presents it visually. That is why you must first decide on the concept of the report, and only after that think over the plot, script, structure of the presentation show.To develop the right concept, give answers to such questions.:
- What goal do you want to achieve with this presentation?
- Who will listen to the speech (audience characteristics)?
- What visual elements are planned to be used in the presentation?
- What is the duration of the performance?
Step 2. Project start.
Launch PowerPoint and use the corresponding function to create a new slide show (by page type word document). Click on the option in the navigation bar and decide on the layout. It can become both a layout for an individual slide, and for the presentation as a whole.
Helpful Tips:
- A large amount of information is difficult to perceive, it distracts a person, does not allow him to concentrate. Ideally, one slide will contain one block with text, videos, photos, tables and other elements.
Step 3. Templates to help.
For those who create a presentation for the first time, it is possible to use pre-installed templates, which greatly simplifies the matter. And only when PowerPoint is mastered inside and out, you can create custom samples that will meet your specific requirements and tasks.Since we are creating our first presentation so far, we select a template that is already preinstalled in the program. To open the menu, press the Office Button and select New. The Templates group and the Empty & Recent command will appear in a new window. By double-clicking on the "New Presentation" button, we create a project.

You can also use the Installed Templates command. By clicking on it, you can choose the type of template from a classic or modern photo album, advertising booklet, quiz, widescreen presentation. The choice of this or that template is determined by the form of the presentation.
Step 4. Customize the appearance.
This step is important and necessary. Open the Design tab and from there go to Themes. Decide on the topic of the document and select the one you want. The appearance of the slides can also be changed. Open the "Slides" tab, decide on a theme and apply it to one or more slides by clicking on the appropriate command.
Themes preinstalled in the program are suitable for all presentations. And to make the selected theme unique, there are separate buttons with which you can select the background, color, animation effects.
Experienced PowerPoint users don't use built-in themes, they create their own. To do this, you need to apply your own photos and images.
- The text must stand out against the background, otherwise it will be difficult to read.
- The more color solutions, especially colorful shades, the more difficult the text is perceived. The main thing here, as in clothes, is not to overdo it with colors and make them compatible.
- Three or four combined shades ideally concentrate the attention of the audience, increase the perception of information.
Step 5. The correct font.
When working with a presentation, just like in Word documents, you can change fonts by choosing the type, color, size. In a word, if you are familiar with Microsoft Office programs, then you will learn how to work in PowerPoint.
To select a graphic design of letters and symbols, open the "Home" tab and decide on the font, its color and size. Then fill in the "Title" and "Text" fields of the created slide.
- The text on the slide should be divided into two parts. There are main words and auxiliary ones that complement the main idea of the message. And accordingly, an important part of the text should be highlighted. This can be done with an unusual font, size, color and, of course, special effects. You can also make it so that first went main information and then additional. In a word, in order to convey the main idea of the slide, it is necessary to place the accents correctly.
- Solid text (same color, font size) is not allowed. Divide the information into semantic blocks and apply a different font size for each. Headings, subheadings, comments to images, main text should be visually highlighted.
- It is important to arrange the text so that it stands out, visually attracts attention. Underline key words, write in italics or bold, Special attention give headings - they should be conspicuous.
- Do not write more than six lines in a slide, otherwise there can be no talk about the effectiveness of information perception.
- For the entire presentation, preferably choose one font.
- Don't use hard-to-read fonts. The interlocutor must read the line instantly, and not decipher exotic "squiggles".
- A large amount of textual information on one slide is difficult to understand. Better 10 capacious words than a "sheet" of text.
Step 6. More visibility!
If the plot of the presentation allows and so it is necessary for the best visual perception, apply a variety of elements. It can be an image, a diagram, a clip, a collage, a diagram, a table - anything that serves as a visual proof of your information. To place any element on the slideshow, use the "Insert" tab or known commands.
Helpful Tips:
- It's best if you don't use text-wrapped images. Text is digested more efficiently if it accompanies a graphic element located on a separate page (in this case, a slide).
- All graphic material used in the presentation must be of high quality. Do not include small images. A stretched photo will ruin the entire presentation.
Step 7. Soundtrack.
Music, sound track - an attribute of a win-win presentation. Click on "Insert", open "Media Clips" and select "Sound". A window with lists of commands will open, select "Sound from file". Another window will open in which you need to specify the folder with your music and select the file type. Decide on how to play the audio track (on click or in automatic mode). If you choose the former, the Audio Work tab will appear. Go to "Sound Options" and set up playback commands.
Helpful Tips:
- Do not put on loud music and sound: the audience must hear your performance
- As you understand, hard rock cannot accompany your performance. Choose calm music.
Step 8. Effects.
Their use decorates the presentation, makes it diverse, adds emotionality and semantic load. Animation effects can be applied to any graphic element or object, if they are, of course, appropriate. Animation is configured on the corresponding tab. In order to add an effect for a graphic, object, text, click on it and adjust the animation by clicking on the corresponding item. Added effects can be changed.
Helpful Tips:
- The abundance of special effects does not diversify the presentation, but, on the contrary, will harm it. The audience is distracted by the attention-grabbing animation, skipping the textual content.
- Animation inserts should be used minimally and carry a semantic load.
- Effects are appropriate for highlighting facts, figures, keywords, in conclusion.
Step 9. Slide transition effects.
When one slide in a presentation is replaced by another using animation effects, it attracts attention. PowerPoint has many preset transition types - blinds, checkers, rectangles, vertical and horizontal unions.To apply the same type of transition to each slide in your presentation, click the Animation tab. Click first on your thumbnail and then on "Go to next slide". Here you can select the desired effect.

The slide transition effects you choose can be customized. If you want to change the speed, click on "Go to the next slide" and select the appropriate button. By clicking on it, set the values you need. You can also change the order of slide transition effects. To do this, you need to go to the appropriate group and make settings: slides can change on click or automatically.
An audio track is added to the slide transition effects. Open the Animation tab and then the Transition to the next slide. Select the Transition Sound button. If the sound is in the list, click on it. If you need to add a sound not from the list, click on the "Other sound" command. Find the file on your computer and add it using the OK button.
- Frequent sound when changing slides is unacceptable.
- Do not use automatic slide change.
- Be sure to indicate in the test where the slides change.
- The person who deals organizational issues, there should also be text with these hints.
Step 10. The presentation is ready!
Each slide is ready and now you can look at the entire presentation. Click "Slide Show" and start watching. If you don't like something in your work, you can always correct it. To return to the slides, press the "Escape" key. Be sure to save the modified and viewed slide.- When a presentation is visually appealing through colorful objects, graphic elements, and vibrant animations, that's good. But the skill of the orator in this matter is still the main thing.
Conclusion
By learning how to work in PowerPoint step by step, you will be able to create vivid, memorable presentations and skillfully present them to different audiences. The Microsoft Office program with each new slide show will surprise you with its functionality. And you will have the feeling that this tool cannot be mastered to the end. But each new presentation will be better and better, which means that you have learned all its lessons for five.To download a program for creating, viewing, showing slide shows and presentations on your computer, use the official source - site.
A complete guide to creating, designing and filling presentations. There are examples, advice from Guy Kawasaki, one of the first Apple marketers, and patterns that are not ashamed to speak even at the international level.
But if you don’t have such a person under your control, but you still need to make a presentation, this article will help you, where we have collected almost all the necessary information. Templates, ingenious examples and professional advice will help you make, if not a masterpiece, then certainly something outstanding!
Presentation (from Latin praesento - I pass, I hand) - a way of presenting information both with the help of technical means, and without them; oral presentation, which may be accompanied by visual images, aimed at conveying information to the public, persuading it to perform certain actions.
Depending on what you want to tell in your presentation, its type will depend. It can be informational, persuasive, image-building, motivating, questioning and multi-purpose.
Guy Kawasaki, one of the first Apple marketers, advises following the 10/20/30 rule: 10 slides, 20 minutes, 30th font. 10 slides is the optimal amount that the audience can fully absorb. If you have done much more, then you have failed to highlight the main theses. 20 minutes is the time that viewers can concentrate without interruption. Font size 30 will allow you to put on the slide only the most necessary and important information.
Components of a presentation
To achieve the desired effect, you need to clearly understand what and when to say and show. The classic presentation structure looks like this:
- Title slide (topic, contacts, information about the speaker, product, service).
- Table of contents (optional).
- Introduction (what is the presentation about, goals, objectives. Interest the listener why he needs to spend time on your report).
- The main part (all necessary information: may contain several sections, at the request of the author).
- Conclusion.
- Application (optional).
- Thank you for your attention (don't forget the final thank you slide).
Presentation rules
Now you won’t surprise anyone even with an interactive Prezi presentation. Therefore, others need to "take". First of all, excellent stylish design. And if your company does not have a single corporate template for presentations, this gives you a huge field for creativity. Just don't overdo it.
- Decorate everything in the same style. Do not "jump" from one background to another. Watch out for the compatibility of colors, backgrounds and fonts. The font compatibility table is .
Don't use the standard PowerPoint design templates. They are boring and boring. It is better to choose your own color palette. For example, on Piknik all the basic colors are collected, and on Color Lovers you can find both ready-made selections of shades, and make them yourself.
Check out infographic color tips from a professional designer.
- As few words as possible. No one will read huge test blocks for the entire slide. Minimum - 25-30th kegel, font - readable. Change the font to highlight quotes or notes. Use headers.

- Do not use animation and music when changing slides. Leave it to the students.
More pictures.
Replace tables and lists with infographics and charts.
Many presentation services have the ability to add video. True, this requires access to the Internet during the demonstration to the audience.
Developer and startup advisor Zach Holman has been working with presentations for various projects for a long time. On his website, he shares tips on how to design them.
Color
Choose contrasting colors. This makes it possible to vary fonts, backgrounds, and other presentation elements. I have about 4 colors that I use all the time, and 8-10 with their shades.
The size
Make your text huge, get rid of half of the words on the slide and make the remaining most important text even bigger.
Usually my text is at least 90 pt, sometimes I use 150 pt and even 300 pt.
Words as forms
The letters themselves can be part of the design. The easiest way to make a slide more interesting is to play with the physical side of the letters that make up the words, i.e. the size.
The text (font) on almost every new slide in my presentations differs in size. This is how I separate one thought from another. It turns out much more interesting than just bulleted lists.

Illustrations in presentation
Images are the basis of a presentation. A presentation in general is a visual thing, so it is important not only to choose good illustrations, but also to place them correctly on the slides.
What do we have to do:
- If you find a picture in a search engine, make sure that there is no watermark on it. And if you work at a serious level - also for a license to use!
Keep in mind that your presentation may be viewed from a small screen (tablet or mobile phone), and from a large one (computer screen, projector). Choose high resolution photos.
Use photos as a background. Of course, for this you will need to slightly correct the image: reduce brightness, contrast or darken the picture.
Pay attention to the hand-drawn illustrations. They will definitely make your presentation unique.
Choose an unusual, eye-catching image for the first slide. Don't forget about the picture for the last slide ("Thank you for your attention").
What not to do:
Do not use standard pictures and illustrations, especially from PowerPoint. They can be replaced by vectors.
Don't use too many images on one slide. The audience will not have time to see everything. In addition, to fit everything on the screen, they will have to be greatly reduced.
Do not place the image against an edge or corner.
Do not overlap one image with another.
Presentation Software
In addition to the standard PowerPoint, there are many other excellent programs for creating presentations.
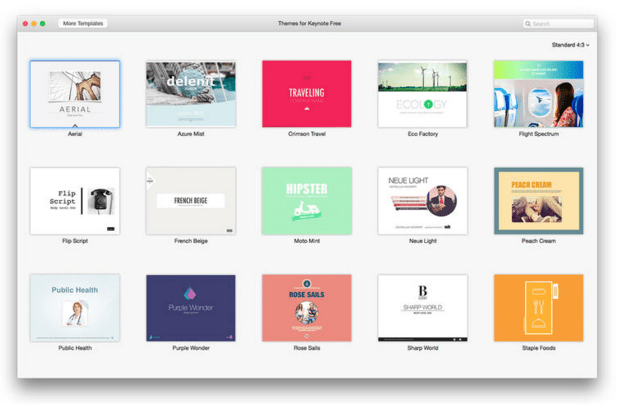
- Apple Keynote
The main competitor of PowerPoint, close to him in interface. A large selection of chic templates that are a sin not to try. Available on all Apple devices.

- custom show
An excellent tool for creating business presentations from a company with more than 40 years of history. You can not only create presentations and share them with colleagues, but also arrange online meetings, work offline and online and on various devices, add video and audio, upload slides from PowerPoint, change settings in accordance with brand requirements.

- Haiku Deck
Program for lovers of minimalism. The main rule is the minimum amount of information in the warehouse. One slide - one idea - one visual accompaniment (image, infographic, chart).
Great for making simple presentations. At the same time, editing templates is limited: developers are trying to maintain the high quality of work in this way so that the user does not turn the template into a “silent horror”.

- slidedog
It's not a pure presentation editor. You can't make your own slides, but you can put everything you want into a single presentation: a presentation from PowerPoint, Keynote, Prezi, a PDF file, a video, an audio file, a web page. No more switching between different programs.

Online services for creating presentations
- Prezi
One of the most popular services after PowerPoint. The entire presentation is one field, each part of which is zoomed in by pressing a key. The ability to see the full presentation from above, which immediately gives insight and structure.
The tool is interesting and original, but not very suitable for serious business presentations. There is a free version with limited features. The paid one starts at $4.92 per month. There is a mobile application and a separate program for PC.

- Google Slides
Very similar to PowerPoint with slightly reduced features. Allows you to make simple presentations for basic purposes. Although, if you try hard, you can make a cool Google presentation. - Cards
Ready-made slides with various cards.


Paid


Now even a schoolboy needs the skill of creating presentations. Without visual materials not a single report is missing. The visual range makes the information more interesting and digestible. Therefore, everyone needs to learn how to make a presentation on a computer.
What is a presentation, for what purposes is it created
A presentation is a document that includes textual and graphical data, and sometimes audio. The pages that make up a presentation are called slides. The purpose of the creation is to improve the perception of information by listeners, and this is also done in order to make the report more exciting and memorable.
It can be presented:
- electronic;
- through the projector;
- printed on a printer in the form of graphic materials;
- posted on the Internet.
The presentation is created in special programs designed for this. One such program is PowerPoint.
Main components
Every presentation is made up of:
- text;
- tables;
- charts and other graphs;
- drawings;
- animations.
Some reports also use video and audio materials.
How to make a presentation on a computer using PowerPoint - step by step guide with screenshots
One of the most popular programs for creating visual materials for a report is called PowerPoint. It is included in the Microsoft Office package along with Word and Excel, so almost everyone has it on their computer. Therefore, everyone can learn how to make presentations.
Work begins with the creation required document. This is done as follows: on the desktop, right-click the taskbar, in which you need to select the "Create" command, and in the window that opens after that - "Microsoft Office PowerPoint Presentation". After selecting this command, a document will be created on the desktop, by default named "Presentation".
Double-clicking the left mouse button opens the document, it looks like this:
How newer version PowerPoint, the more modern its design
You can choose a different type of slide using the "Layout" subsection
After that, you can start working with its content.
General design
It is better to start work, starting with the choice of design. This is what the layout will be. "Design" is the third tab in the top left corner of the window:
All kinds of slide designs are compatible with both old and new versions of PowerPoint
Here you can choose the overall design of the slides, the color scheme of the design, fonts and applied effects. Here is what you can choose from in each of these tabs:
You can also use the effects found in the "Transitions" tab
You can choose the color scheme from the proposed range, or you can create your own design style:
Do not choose colorful and eye-catching colors
In the "Fonts" section, you can also choose from the proposed ones or enter something of your own:
Do not choose a rare font if you are going to show the presentation on another medium: it may not recognize it
Another important component of PowerPoint themes are effects, they provide customization appearance. Theme effects can be applied automatically, whether the theme has been previously applied or not. You can also apply effects related to another theme by clicking the Theme Effects button, which is located in the upper right corner of the Design tab.
Work with text
One of the main components of the presentation is information in text form. The text is inserted into the body of the slide, usually from a Word document using the "Copy" - "Paste" command.
In addition, for working with text in PowerPoint, the Review tab is provided, with the help of which tools you can perform the following actions:
- checking for spelling errors;
- translation into other languages (using the "References", "Thesaurus", "Translation" tools), and to mark text or individual words for a specific language, use the "Language" button:
Optionally, in the "Home" section, you can change the font and other text parameters:
PowerPoint is easy to digest thanks to its lightweight and intuitive interface.
Working with images
Images add visibility to the presentation and make it more interesting for listeners. You can insert an image into a slide like this:
- save the desired picture to the desktop;
- sequentially select the “Insert” - “Picture” tabs in the upper left corner of the window, the “Insert Picture” window will open, where you need to select a graphic document, in this case it is the “225” file, which you must click on:
If your picture is not found during the search, try changing the query to "All Pictures" in the lower right corner
The result will be the following:
You can adjust its size on the slide yourself.
Working with tables and graphs
Inserting tables and graphs into the slide body is carried out in the same way as adding pictures through the "Insert" button (for this, you need to select the "Chart" button here, after which a window with chart types will open; you need to choose which view you need:
You can also change the colors of chart objects, their number
As a result, 2 windows will pop up: one is, in fact, with a chart of the selected type, and the second is with a table of initial data for the chart:
Inserting tables into a slide is carried out in the same way (see the left side of the window):
If there are more than eight columns, then you can add columns yourself by right-clicking on any column and choosing the desired location
After creating a table, the Design tab opens, where you can adjust the table format, color, and other data
Here you need to set the necessary parameters of the table and fill it with data.
Working with video and sounds
Video is inserted in the same way as photos and pictures, but when you add a video clip, the buttons "View", "Sound volume" and other tools for working with video files appear in the upper left corner of the window:
As you can see, you can select a video from both your computer and the Internet.
If the video will be shown on another medium, then you must definitely download the video and transfer it to it, otherwise the video will not be displayed
Working with animation
Animation is needed to customize the playback of slides, namely, the features of their appearance one after another. In the "Animation" tab, you can choose the following ways to change slides:
Animations make the presentation more interesting
- lack of animation (slides will simply turn on one after another without any additional effects);
- discoloration;
- fading through black;
- cutting;
- cutting through black;
- dissolution;
- appearance from above, below, right, left;
- symmetrical circular slide change.
Here you can also adjust the speed of the slide transition, as well as the sound design of the transition.
Save and run
There are two ways to save a document:
- Through the “Office” button: in the drop-down window, select “Save” or “Save As” (in the latter case, you can give the presentation your name and select the location on the computer where it will be saved).
- Through the "Save" button: in this case, you just need to click on it and then close the presentation:
The presentation is launched through the "Show" button, which appears when you right-click on the presentation:
You can also do this in PowerPoint in the Slideshow tab.
After clicking on this button, the presentation opens, after which you can start the slide show:
Slides can be switched using the space bar
Additional Information
When showing slides, you can use various graphical tools for clarity, for example, a pointer (it is called by right-clicking on the screen):
The dot in the picture is the pointer
Other presentation programs, including online
There are other presentation tools besides PowerPoint. Let's consider some of them:
- impress. Almost the same as PowerPoint. Unlike PowerPoint, in Impress you can export a document not only to standard view, but also to HTML and SWF formats, but conversion to a video file is not possible.
- Kingsoft Presentation. Allows you to work on multiple presentations at the same time. You can insert text into slides graphic images, charts, tables, video in Flash format. The document is saved in Kingsoft Presentation (.dps) or PowerPoint (.ppt) format. You can also convert your presentation to pdf.
- ProShow Producer. Unlike previous tools, ProShow Producer is a professional paid program. You can download a free trial version for 15 days. Provides ample opportunities for working with templates, including adjusting the brightness, contrast, removing the "red-eye" effect.
- PromoShow. A program for creating promotional presentations and clips containing 3D effects. Allows you to work with text, video, photos. Includes about 120 effects. But for ordinary ones, for example, educational presentations, such a program is simply not needed.
- Prezi. English-language program for advertising presentations. Like the previous one, it presents a wide range of opportunities for creating clips, but subject to English proficiency.
- VideoScribe. Program for creating animated presentations. This approach allows you to present information in the most interesting way, for example, to interest potential customers. The program contains a large selection of animation methods.
- slidedog. SlideDog is a program for combining various graphic objects, text documents, videos, animations, audio tracks, web pages and even YouTube videos. The program can even be synchronized with a mobile application and control the presentation from your phone.
- Hippani Animator. A program for creating video presentations, it can also add sound. When saving a presentation as an HTML document, remote broadcasts can be performed. The program is paid, the trial period is 30 days.
- wink. Makes presentations from actions performed on a computer screen. It looks like a video clip.
- Adobe Presenter. In addition to the same features that PowerPoint provides, there are tools for creating online tests and surveys.
As can be seen from the above, there is a wide range of tools for creating presentations. However, if you need a presentation for a training report, PowerPoint will suffice.
General rules and design secrets
Exist general rules, the implementation of which is necessary for your report to be successful:
- presentation of information should be as simple as possible;
- graphic information should prevail over text;
- the speaker should not read from the slides;
- text and pictures on slides should be large;
- You need to carefully prepare for the performance and rehearse it.
If these conditions are not met, the listeners will initially tense up and get annoyed, and then they may even fall asleep.
How to avoid common mistakes when creating and displaying
Here are the most common mistakes people make when creating presentations and how to avoid them:
- sorting information. Instead, present information as concisely as possible;
- black stripes on the sides of the picture on the slide (photo format 4:3). Use widescreen instead;
- placement of the logo and contacts of the organization on each slide. Instead, leave this information on the title slide only;
- use of typical pictures that are copied from document to document. Instead, use original photos;
- photo with a white background on colored slides. It is better to remove such a background.
If you follow these rules and avoid common mistakes, it will be much easier for your listeners to perceive the information that the presentation carries.
How to Create a Unique PowerPoint Presentation: Video Tutorial
How to work in PowerPoint 2013/2016?: tutorial video
Presentation skills are useful for almost everyone. modern people. If you do not have goals for creating professional slides (for example, for advertising campaigns), then special programs, in principle, will replace PowerPoint. There are general design rules that you should learn before making a presentation in order to avoid the most common mistakes.
Reading 6 min. Views 123 Published on 09.02.2018
Sooner or later, every user asks the question,. In today's article, we will look at the available programs, as well as a guide to working in one of them. Today there are several simple options, in addition to the familiar Microsoft PowerPoint, but having gained the skills to work with a presentation in it, the user can easily master all the others.
Program selection
So, what programs are freely available today.
- Microsoft PowerPoint is a timeless classic. If Microsoft Office is installed on your PC or laptop (for example, you), then this program is also available. It is enough to find it and open it, or simply initiate the creation of a presentation by right-clicking on an empty space on the desktop.
- PowerPoint Online - simplified and free service based on the above program. You can use it if the necessary utility is not on the PC. You can find the service in the OneDrive cloud.
- LibreOffice Impress is an alternative suite of office programs. More simple than Microsoft, but no less effective. The principle of creating and editing presentations is similar to the previous options.
- Google Slides is an online service for creating the necessary files based on Google Drive. Compatible with the first program, therefore, it allows you not only to create from scratch, but also to upload ready-made presentations with subsequent saving and converting to a format suitable for editing.
This is not a complete list of available programs. There are more professional and complex options for a simple user. We will not consider them in the current article, since a simple presentation in PowerPoint is most often enough.
, step-by-step instruction
As mentioned above, if the user masters a simple program PowerPoint, then he will not have problems with the rest of the designers. In this connection, the instructions for creating will be described specifically for this utility.
Create a presentation
In order to create new presentation just launch the program from the start menu. Or just right-click on an empty area of the desktop and click "New" and then select " Microsoft presentation PowerPoint" and open the resulting file.
As a result, the program window will open with the first slide of the presentation empty for the time being. We click on the field of the designer, in which the slide is located and proceed to design the presentation.
Slide design
You can design the slide yourself or use already ready template. The second option allows you to reduce a lot of time on design, but if as a result you need a non-standard product, then you should use it.

Pressing the "Apply to all" button automatically propagates the settings to all other slides of the presentation, this allows you to maintain a single style throughout its entire length. If you do not give such a command, then the settings will be displayed only on the slide on which the work was carried out. If something went wrong and the result did not live up to expectations, you can click "Restore Background" and everything will return to its original position.
Work with text
To add personality finished presentation it is worth working with fonts, as the standard proposal does not please with its sophistication. Let's figure it outwith original font and text display settings. 
To design the title and subtitle of the title slide, simply click on the desired blocks and enter the required text. You can change the current style and features of the character outline in the main tab. For more customization, use the Format tab. There you can make more detailed and precise font settings. It is important to highlight the desired part of the text before starting work.
Pictures on slides
A presentation without images on slides looks dull and not convincing. You can add an image, photo, graph or chart through the "Insert" tab. The program offers not only to install a picture from a PC, but also to find and download an image from the Internet. You can also add a SmartArt object to make important information more visible. 
For the image, you can also use the editor in the "Format" tab. This will allow you to adjust the display effect, brightness, adjust color correction and other subtleties. For a more complete understanding, go to the tab and experiment. Do not worry that something may not work out, and you will spoil the operating time, you can always undo the last actions with the “back” arrow in the top panel of the program.
Making the transition
How to make a presentation on a computerwith pleasant transitions, and not just a change of slides, not many people know. And this is one of the important details of the finished product. It is always more pleasant to look at slides smoothly replacing each other with a customized transition effect. 
To implement this setting, there is a special tab "Transitions". The user can choose both simple and more effective methods of changing slides. The "Effect Options" button will help to give even more individuality. The transition can be accompanied sound effect. You can also flip through the slides yourself, or you can automate the process. All settings are made in the current tab.
Using audio
On the this stage the presentation is almost ready. Now the resulting product is perfect for providing information at the time of the report in the office. The slide change and the speaker's speech complement each other. But if you want to create a presentation accompanied by sound, then you need to work a little more.
In the "Insert" section, select the "Multimedia" tab; it allows you to insert not only sound, but also video files into the presentation. Moreover, you can use not only files downloaded to your PC, but also from the Internet. 
Now questions shouldn't stay. All the main points are discussed in detail in the instructions. Do not be afraid to experiment, remember that any action can always be undone and rolled back to the previous version.
The instruction is written on the basis of Microsoft PowerPoint, but the principles of creating and editing presentations are preserved in other programs. What programs do you prefer to use? Which is more acceptable to you, using an installed program or an online service? How do you design slides, templates or create your own design?
It might be useful to read:
- Electronic library systems;
- Logistics supply chain;
- Tenders for corporate projects;
- Accounting 8.3 retail. Tenders for corporate projects. Support and maintenance;
- Vintage letters Letter in the style of the 19th century;
- How to sell "live" trainings;
- The Vatican Club of Rome led the AIDS contagion;
- Training courses for personnel office work and personnel management for specialists from any region of Russia!;